Here in Chicagoland, our homes have to endure a lot—from humid summer days to freezing winters. That’s why a great paint job is so much more than a cosmetic update; it’s a protective shield. The process of painting the exterior of a house in our climate requires careful planning and the right materials to ensure the finish doesn’t crack, peel, or fade prematurely. This guide is tailored to help you get it right. We’ll cover everything from the ideal season for painting in our area to selecting weather-resistant formulas that will keep your home looking its best for years to come.
Key Takeaways
- Successful painting is 90% preparation: Before you even think about color, dedicate time to thoroughly cleaning, scraping, repairing, and priming your home’s exterior. This foundational work is the single most important factor for a durable, professional-quality finish.
- Work smarter, not harder, with a clear plan: Schedule your project for a stretch of mild, dry weather. For crisp lines and a clean finish, always paint your trim first, then tackle the siding by working from the top down to prevent drips.
- Choose the right materials for a lasting finish: Invest in a high-quality, 100% acrylic latex paint with a satin finish for siding and semi-gloss for trim. Applying two full coats is non-negotiable for achieving vibrant color and long-term protection against the elements.
Your Essential Exterior Painting Toolkit
Before you even think about swatches and color palettes, let’s talk about tools. Having the right equipment on hand is the difference between a project that goes smoothly and one that ends in frustration. Think of it like prepping your ingredients before you start cooking—it makes the entire process so much easier. A successful paint job starts long before a brush touches your siding. Gathering your supplies first ensures you can work efficiently and safely, setting you up for that flawless, professional-quality finish you’re aiming for. When you’re prepared, you can focus on your technique and enjoy the transformation of your home’s exterior.
Must-Have Painting Supplies
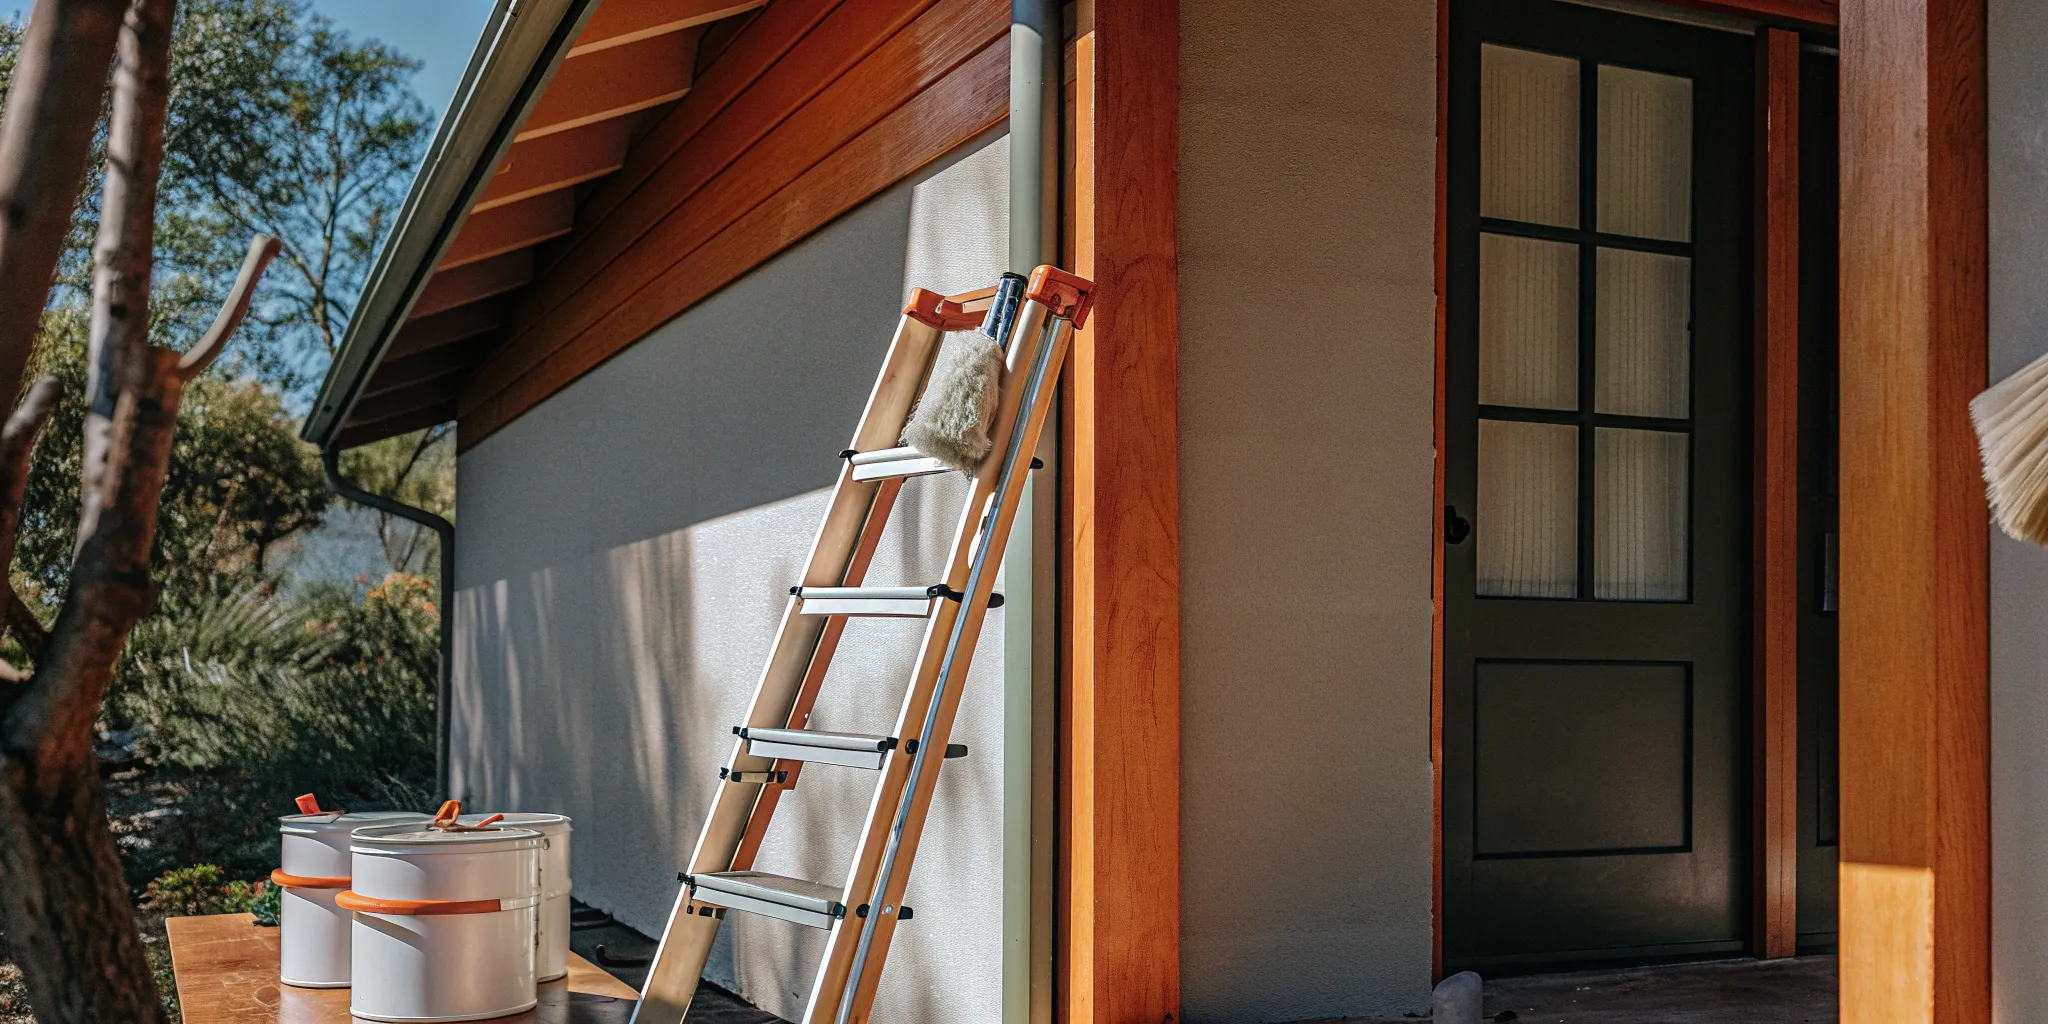
First things first, let’s build your shopping list. You’ll need the basics: high-quality exterior paint and a good primer to ensure it adheres properly. Grab sandpaper in a few different grits for smoothing rough spots, along with an assortment of brushes and rollers for different surfaces. Painter’s tape is your best friend for creating crisp, clean lines around windows and trim. You’ll also want plenty of drop cloths to protect your landscaping and walkways from drips. Finally, a sturdy, reliable ladder is non-negotiable for reaching high spots safely. Getting these core supplies is the first step in any successful home renovation, so don’t cut corners here.
Safety Gear You’ll Definitely Need
This part is not optional. Working with paint and on a ladder comes with risks, so it’s important to protect yourself. You’ll want a respirator or dust mask to avoid inhaling fumes and particles, especially when sanding. Safety goggles are a must to shield your eyes from paint splatters and debris. A pair of durable gloves will keep your hands clean and protected from chemicals. It’s also smart to wear long sleeves, long pants, and non-slip, closed-toe shoes to protect your skin and prevent falls. A hat can protect your head from the sun and stray drips. Our professional team always prioritizes safety on every job, and you should too.
Choose Your Tools: Brushes, Rollers, or a Sprayer?
How you apply the paint is just as important as the prep work. For large, flat areas like siding, a paint sprayer can be a huge time-saver, but it takes some practice to get an even, consistent coat. If you go this route, be sure to adjust the settings and practice on a piece of cardboard first. Brushes are essential for detailed work like cutting in around trim and windows. Rollers are great for covering surfaces quickly and work well on everything from smooth to textured siding. For a durable, rich color, always plan on applying two coats of paint, letting the first one dry completely before starting the second. This extra step is key to achieving a beautiful, long-lasting professional finish.
How to Prep Your House for a Fresh Coat of Paint
If you want your new paint job to look amazing and last for years, you can’t skip the prep work. It might not be the most exciting part of the process, but it’s the single most important factor in achieving a durable, professional-quality finish. Think of it as creating the perfect canvas. A clean, smooth, and solid surface allows the paint to adhere properly, preventing the peeling, cracking, and bubbling that can happen when you paint over dirt or damaged areas. Taking the time to properly prepare your home’s exterior ensures your hard work pays off and protects your investment. These steps are the foundation of any great paint job, whether you’re tackling it yourself or bringing in a team for a full home renovation.
Start with a Thorough Cleaning
First things first: your house needs a good wash. Over time, exteriors collect a surprising amount of dirt, pollen, cobwebs, and even mildew, none of which you want to trap under a fresh coat of paint. For most homes, a pressure washer is the quickest way to remove grime and loose paint. Just be careful to use a low-pressure setting to avoid damaging the siding or forcing water into cracks. If you don’t have a pressure washer, a garden hose, a bucket of soapy water, and a long-handled scrub brush will also do the trick. Once it’s clean, you have to be patient. Let the exterior dry completely for at least 24 to 48 hours before moving on to the next step.
Scrape, Sand, and Repair Imperfections
With the surface clean and dry, it’s time to play detective. Walk around your house and look closely for any paint that is peeling, cracking, or blistering. Use a paint scraper or a wire brush to carefully remove all the loose bits until you’re left with a solid edge. This step is crucial because new paint won’t stick to failing old paint. After scraping, you’ll likely have some uneven spots and rough edges. Use a sander or sandpaper to smooth these areas out, creating a seamless transition between the old paint and the bare surface. This meticulous work is what gives the final result that flawless look you see in our project gallery.
Get Rid of Any Mold and Mildew
While cleaning, you might notice some dark, splotchy stains, especially in damp or shady areas. This is likely mold or mildew, and it needs to be treated before you paint. Simply painting over it won’t solve the problem—it will just grow right through your new paint. You can tackle these spots with a commercial cleaner or a solution of one part bleach to three parts water. Apply the solution with a sponge or sprayer, let it sit for a few minutes, then scrub and rinse thoroughly. Always wear gloves and eye protection when working with these cleaners. If you have widespread mold, it could signal a larger moisture issue that needs addressing.
Fill Cracks and Apply Primer
The final prep step is to make the surface whole and ready for paint. Use an exterior-grade filler or caulk to fill any small cracks, holes, or gaps, especially around windows and doors. This not only creates a smoother finish but also prevents water from seeping in and causing damage later. Once the filler is dry, sand it smooth. Now, it’s time for primer. Primer is essential for ensuring the paint sticks properly and looks uniform. You’ll want to apply a coat of high-quality exterior primer to any bare wood, new filler, or stubborn stains. This step seals the surface and provides the perfect base for your topcoat to adhere to, giving you a vibrant, long-lasting finish.
How to Choose the Right Exterior Paint
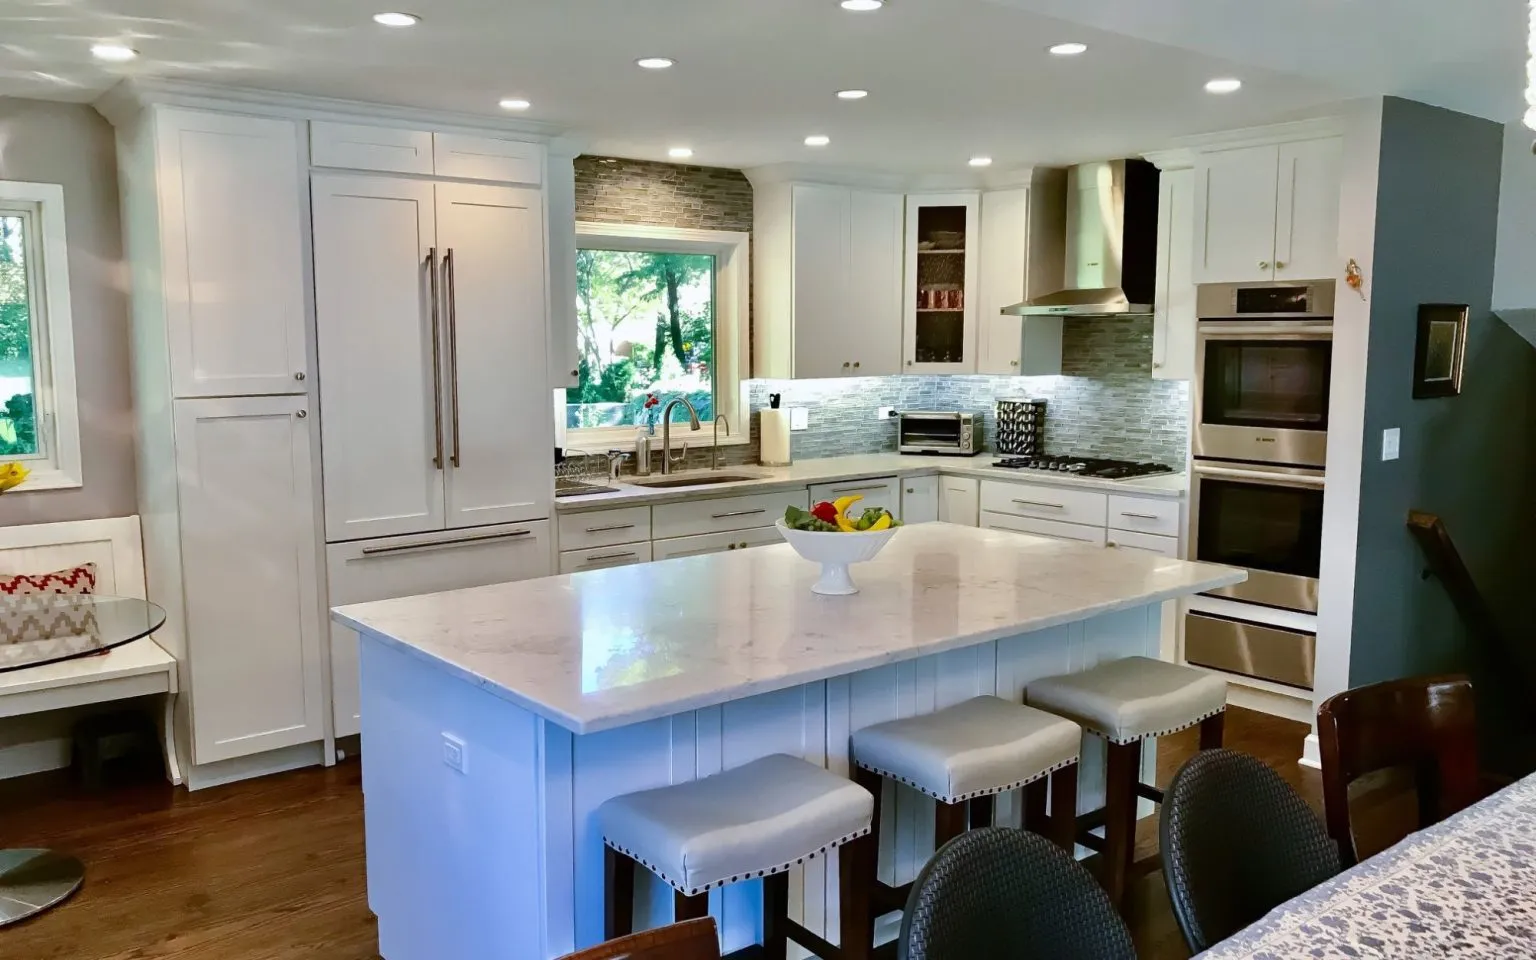
Picking an exterior paint goes far beyond choosing a color you like. The right paint acts as a shield for your home, protecting it from moisture, sun, and the dramatic temperature swings we get here in Chicagoland. A great paint job can extend the life of your siding and trim, preventing costly repairs down the road. Think of it as a crucial part of your home’s overall health and one of the most impactful home renovations you can make. Making a smart choice now means you’ll have a beautiful, durable finish that lasts for years.
Find the Best Paint Finish for Durability
The finish, or sheen, of your paint plays a huge role in its durability and appearance. While a flat or matte finish is great at hiding imperfections, it’s less durable and tends to trap dirt, making it difficult to clean. For exterior siding, a satin finish is almost always the best choice. It has a subtle sheen that resists mildew and fading from UV rays, and it’s much easier to wash. For trim, doors, and other high-touch areas, a semi-gloss or gloss finish is ideal. These shinier finishes are incredibly tough, moisture-resistant, and simple to wipe clean, ensuring your home’s details really stand out.
Select a Weather-Resistant Formula
Your house puts up with a lot, from blistering summer heat to icy winters. The paint you choose is its first line of defense. That’s why selecting a formula designed for our climate is so important. Look for a high-quality, 100% acrylic latex exterior paint. This type of paint is flexible, which means it can expand and contract with temperature changes without cracking or peeling. It also offers excellent adhesion and breathability, which helps prevent moisture from getting trapped in your walls. Investing in a premium, weather-resistant paint will give your home a protective barrier that stands up to the elements.
Tips for Picking the Perfect Color Palette
Choosing a color scheme can feel overwhelming, but a few simple tips can make it much easier. Start by considering the fixed elements of your home that won’t be changing, like your roof, brick, or stone accents. Your paint colors should complement these features. Next, gather inspiration by looking at homes in your neighborhood or browsing an online project gallery. Once you have a few ideas, always buy samples. Paint a large swatch of each color on different sides of your house to see how it looks in the morning sun versus the evening shade. A good rule of thumb is to use three colors: a main color for the siding, a lighter or darker shade for the trim, and a bold accent color for the front door.
When Is the Best Time to Paint Your Home’s Exterior?
Timing is everything when it comes to painting your home’s exterior, especially here in Chicagoland where the weather can be so unpredictable. Picking the right window for the job is just as important as the prep work itself, because a perfectly applied coat of paint can fail if it doesn’t have the right conditions to cure properly. This can lead to frustrating issues like cracking, peeling, and a finish that just doesn’t last, meaning you’ll have to do it all over again sooner than you’d like. A great paint job is your home’s first line of defense against the elements, so you want to give it the best possible start.
Choosing the best time to paint involves more than just finding a sunny day on the calendar. You need to consider a trifecta of factors: temperature, humidity, and the forecast for the next few days. Getting this right is the secret to achieving a durable, beautiful finish that not only looks fantastic but also protects your home for years to come. For many homeowners, exterior painting is part of larger home renovations, making it even more critical to schedule the work during the ideal season. Proper timing helps keep the entire project on track and ensures every component of your renovation gets the attention it deserves without weather-related delays.
The Ideal Temperature and Humidity
Paint is a bit like Goldilocks—it doesn’t like conditions that are too hot or too cold. For the best results, you should aim to paint when the temperature is consistently between 50°F and 90°F. If it’s too cold, the paint won’t cure correctly, which can compromise adhesion and durability. On the flip side, if it’s too hot or you’re painting in direct, intense sunlight, the paint can dry too quickly. This often causes visible brush marks, blisters, and cracks. You also need to keep an eye on humidity. High humidity slows down drying time, leaving the fresh paint vulnerable to dust, insects, and moisture for longer. As a general rule, try to avoid painting if rain is in the forecast for at least 24 hours.
Plan Your Project Around the Forecast
In the Chicago area, the best seasons for exterior painting are typically late spring, summer, and early fall. These months usually offer the moderate temperatures and lower humidity levels that paint loves. Winter is generally off-limits due to snow, wind, and freezing temperatures that make a quality paint job nearly impossible. Before you even pick up a brush, it’s a smart move to check the extended weather forecast. Look for a solid stretch of clear, mild days to give your paint ample time to dry and cure properly. This careful planning is what ensures your new paint job will stand up to our tough seasons. You can see how a well-timed project results in beautifully finished exteriors that truly last.
Protect Your Fresh Paint from the Elements
Even after the paint feels dry to the touch, it’s still in the process of curing for days or even weeks. During this vulnerable period, it’s important to protect it from the elements. A sudden downpour can leave water spots or wash away some of the paint, while strong winds can blow dirt, leaves, and other debris onto the still-tacky surface. This is exactly why checking the forecast beforehand is so crucial. A quality paint job acts as a protective barrier for your home, but it needs a little protection of its own right at the beginning. By planning carefully, you ensure your investment in time, effort, and materials is well-protected, leading to a professional-looking finish that endures.
What’s the Best Order to Paint Your House?
When it comes to painting your home’s exterior, the order in which you tackle each surface makes a huge difference. It might seem like a minor detail, but following a specific sequence is what separates a messy, amateur job from a crisp, professional finish. Pros have this process down to a science to ensure clean lines, prevent frustrating mistakes, and get the job done efficiently. By working strategically, you can avoid smudging your fresh paint or having to do time-consuming touch-ups later.
Think of it like assembling furniture—you wouldn’t just start screwing pieces together randomly. There’s a method that guarantees the best result. The same logic applies to painting. Following the right steps ensures every part of your home, from the trim to the siding, looks its absolute best. While it’s a project you can take on yourself, understanding the process helps you appreciate the detail that goes into a professional home renovation.
Start with the Trim and Details
It might feel backward, but trust me on this: always paint your trim, doors, and window frames first. This is one of the biggest secrets to achieving razor-sharp lines. Why? It’s much easier to tape off the trim after it’s dry than it is to tape off the entire main wall. When you’re painting the trim, you don’t have to be perfectly neat where it meets the siding. Any little slips of the brush onto the main wall will simply be covered up when you paint the siding later. This approach lets you focus on getting a smooth, perfect coat on the detailed areas without worrying about making a mess.
Tackle the Siding and Main Walls
Once your trim is completely dry, it’s time for the main event: the siding. Now you can tape off the trim you just painted to protect it, creating a perfect edge. When you start painting the siding, always begin at the top of the house and work your way down. This is where gravity becomes your best friend. As you paint, any drips or splatters will fall onto a surface you haven’t painted yet. You can simply smooth them out or paint right over them as you continue your way down the wall, ensuring a flawless, streak-free finish. This top-down method is a non-negotiable for an even application.
Follow the Top-to-Bottom Rule
The top-to-bottom rule is the golden rule of exterior painting. It’s a simple principle that makes a world of difference in the final outcome. By consistently working from the highest point downwards, you’re always in control of the paint. This prevents drips from running over and ruining sections you’ve already finished, which saves you from the headache of going back to fix mistakes. Applying this rule to every large surface ensures a smooth, uniform coat across your entire home. It’s this attention to methodical detail that our design and build services bring to every project, guaranteeing a polished look from foundation to roofline.
How to Get a Smooth, Professional-Looking Finish
You’ve done the prep work, and now it’s time for the main event. But getting that flawless, professional-looking finish is about more than just slapping on some paint. Your technique is what separates an okay paint job from a great one. It’s all in the details—how you apply the paint, how many coats you use, and how you avoid common slip-ups like drips and streaks. Paying close attention during this stage will ensure your hard work pays off with a beautiful, long-lasting result that truly transforms your home’s exterior. If the process feels overwhelming, remember that a professional team can handle every detail for you.
Use the Right Painting Technique
To get a finish that looks like it was done by a pro, you need to paint like one. A great painting technique starts with a plan. If you’re using a sprayer, tackle the hard-to-reach spots first, like the areas behind trim pieces or under eaves. This ensures you get full coverage without having to contort yourself later. For crisp, clean lines where different surfaces meet—like where your siding meets the foundation—a paint shield is your best friend. It protects surfaces you don’t want to paint and helps you create sharp edges. Always maintain a wet edge as you work to prevent lap marks and ensure a uniform appearance across the entire wall.
Why Two Coats Are Better Than One
While it might be tempting to call it a day after one coat, applying a second is non-negotiable for a durable, vibrant finish. The first coat acts as a base, but it can often look a bit uneven or thin in spots. The second coat provides a solid, uniform color and a protective layer that stands up to the elements. This practice significantly contributes to a longer-lasting paint job, extending its life for years to come. Just be sure to let the first coat dry completely before you start the second—this usually takes about four to six hours, but check your paint can for specific instructions.
Avoid Drips, Streaks, and Uneven Spots
Nothing ruins a fresh paint job faster than drips and streaks. The key to avoiding them is to work methodically. Always paint your trim and doors before moving on to the walls. This way, if any paint drips onto the main siding, you can easily wipe it away without messing up a finished surface. It’s also crucial to work from the top of your house down. This simple rule lets gravity work in your favor, allowing you to catch and smooth out any drips as you go. Don’t overload your brush or roller with paint, as this is the most common cause of drips. A little less paint per application is always better.
Common Painting Mistakes to Sidestep
Even with the best intentions, a few simple missteps can compromise your final result. One of the biggest common mistakes is failing to properly clean the exterior before painting. Dirt and grime prevent the paint from adhering correctly, leading to a splotchy finish that will peel and chip sooner rather than later. Another pitfall is ignoring the weather; painting in direct sunlight or high humidity can cause the paint to dry too quickly, resulting in brush marks and poor adhesion. Finally, always prioritize painting safety. Use the right ladder for the job, wear your safety gear, and never overreach.
Related Articles
- How to Find the Best Exterior House Painting Contractor
- The Ultimate Guide to Exterior House Painting
Frequently Asked Questions
Is it worth spending more on premium exterior paint? Absolutely. Think of exterior paint as your home’s first line of defense against the weather. While a cheaper paint might save you money upfront, it often lacks the durable ingredients found in premium formulas. A high-quality, 100% acrylic latex paint will provide better coverage, resist fading from the sun, and flex with temperature changes, which means it’s far less likely to crack and peel. Investing a little more now will give you a richer, more beautiful finish that protects your home and lasts for years longer.
What’s the one prep step I absolutely cannot skip? If you only have the energy to do one thing right, make it the cleaning and scraping. Painting over dirt, mildew, or peeling old paint is the fastest way to guarantee your new paint job will fail. A clean, solid surface is essential for the new paint to adhere properly. Taking the time to thoroughly wash your home’s exterior and scrape away every last bit of loose paint creates the perfect canvas and is the single most important factor in achieving a durable, long-lasting finish.
How do I know if I should paint my house myself or hire a professional? This really comes down to your time, skill level, and the complexity of the job. If you have a one-story home with simple architecture and you genuinely enjoy this kind of work, a DIY project can be very rewarding. However, if your home is multiple stories, has intricate details, or shows signs of damage like wood rot, it’s often safer and more efficient to hire a professional. A pro team has the right safety equipment for working at heights and the experience to handle repairs, ensuring the job is done correctly and beautifully.
What happens if the weather forecast was wrong and it rains on my fresh paint? It’s a frustrating situation, but don’t panic. The impact really depends on how long the paint had to dry. If it was only a light shower on paint that had been drying for several hours, you might just see some minor water spots or streaks. You can usually fix these by lightly sanding the affected areas once they are completely dry and applying another coat. If it was a heavy downpour on very fresh paint, the damage could be more significant, and you may need to scrape and repaint entire sections.
Why is it so important to paint the trim before the siding? It might seem counterintuitive, but this professional trick is all about efficiency and getting clean lines. It’s much easier to be a little messy when painting the trim first, as any paint that gets on the siding will just be covered up later. Once the trim is dry, you can tape it off perfectly to protect it while you paint the main walls. This method allows you to work faster and results in those crisp, sharp edges that make the final job look so polished.