
Here in Chicagoland, our homes take a beating from the weather. From icy winters to humid summers, your siding is the first line of defense protecting your biggest investment. Choosing the right material is only half the battle; a proper installation is what ensures that protection lasts. Understanding the full cost to install new siding means factoring in materials that can handle our climate and the expert labor needed to do the job right. This article breaks down the costs specifically for homeowners like us, so you can choose a durable, beautiful siding that protects your home for decades to come.
Vinyl, wood, fiber cement, metal—the number of siding options available today can make your head spin. Each material offers a different look, level of durability, and, of course, a different price point. Understanding how these choices connect to the overall cost to install new siding is the key to finding the perfect fit for your home and your budget. This article cuts through the confusion. We’ll break down the pros, cons, and typical costs for each major siding type, explain the other factors that influence your final quote, and give you the straightforward information you need to choose a siding you’ll love for years to come.
Key Takeaways
- Your final siding cost is more than just the material price: Remember to budget for labor, removal of old siding, potential wall repairs, and your home’s unique architectural details, as these elements significantly shape the total investment.
- Think long-term to find the best value: The cheapest material isn’t always the most cost-effective choice. Weigh the upfront cost of siding against its future maintenance needs to make a smart investment that saves you time and money down the road.
- Get a professional on-site quote for a reliable budget: Online calculators offer a rough guess, but an in-person evaluation is the only way to get an accurate, itemized estimate that accounts for your home’s specific needs and prevents unexpected costs.
What Are My Siding Options and What Do They Cost?
Choosing new siding is one of the most impactful decisions you can make for your home’s exterior. It’s not just about curb appeal—it’s your home’s first line of defense against Chicago’s wild weather. The right siding protects your investment, can improve energy efficiency, and completely transforms the look and feel of your property. But with so many materials on the market, it’s easy to feel overwhelmed.
The best choice for you depends on your budget, your home’s style, and how much maintenance you’re willing to take on. Each material comes with its own unique set of benefits and a different price tag. Think of this as your starting guide to understanding the most popular options. Below, we’ll break down the pros, cons, and typical costs for five common siding types to help you find the perfect fit for your home renovation project. Keep in mind these prices are general estimates; the final cost will depend on your home’s specific needs.
Vinyl Siding: The Affordable Favorite
If you’re looking for a budget-friendly and low-maintenance option, vinyl is likely at the top of your list. It’s one of the most popular siding choices for a reason: it never needs to be painted, comes in a huge variety of colors and styles, and is simple to clean. The cost is also a major draw, typically running between $2.50 and $10.75 per square foot installed. While it’s incredibly durable, it can sometimes crack under impact, especially in frigid weather. For many homeowners, though, the combination of affordability and ease of care makes vinyl an unbeatable choice.
How Long Does Vinyl Siding Last?
You can expect vinyl siding to last a good long while—typically between 30 and 40 years, making it a fantastic long-term investment for your home. Of course, its longevity depends heavily on the quality of the material and the installation. Over time, you’ll want to keep an eye out for signs that it’s nearing the end of its life, such as cracked or warped panels, noticeable holes, or pieces that are misaligned or falling off. While vinyl is designed to withstand harsh weather, it isn’t completely waterproof. It allows the wall underneath to breathe, which is why proper installation is so critical. When done correctly, it protects your home, but a poor job can trap moisture, leading to mold, rot, and other headaches you definitely want to avoid.
Wood Siding: Classic Charm, Modern Care
There’s nothing quite like the classic, timeless beauty of real wood siding. It offers a warm, natural look that can complement any architectural style, from rustic to modern. You can find it in various species like cedar, pine, and redwood, each with a unique grain and color. This variety is reflected in its wide price range, from $0.75 to $23.50 per square foot. The biggest consideration with wood is maintenance—it needs to be regularly stained or painted to protect it from moisture, insects, and rot. If you’re willing to put in the work, the stunning result is well worth the effort, as you can see in our project gallery.
Fiber Cement: The Durable All-Rounder
Fiber cement is a fantastic middle-ground option that gives you the best of many worlds. Made from a mix of cement, sand, and cellulose fibers, it’s designed to mimic the look of wood, stucco, or masonry without the associated upkeep. It’s incredibly durable, holding up against fire, insects, and rot. You can expect to pay between $5 and $14 per square foot for fiber cement. Its main drawback is that it’s heavy and requires specialized tools for installation, so this is definitely a job for the pros. For homeowners who want a premium look with minimal maintenance, fiber cement is an excellent investment.
Metal Siding: A Sleek and Modern Choice
For a sleek, modern aesthetic, consider metal siding. Typically made from steel or aluminum, it’s known for its exceptional durability and longevity. Metal is resistant to fire, pests, and moisture, making it a tough and protective choice for your home. The cost generally falls between $6 and $10 per square foot. While steel is incredibly strong, it can rust if the finish gets deeply scratched, and aluminum, while rust-proof, can be more prone to denting. Metal siding is a great fit for contemporary homes or for homeowners who want a unique, industrial-inspired look that will last for decades.
Stucco Siding: Timeless Texture and Appeal
Stucco provides a beautiful, seamless, and textured finish that stands out in any neighborhood. While often associated with warmer climates, modern application techniques make it a durable and stylish choice for Chicagoland homes. Made from a cement-based plaster, it’s applied in layers to create a solid, hard-wearing shell over your home. The cost typically ranges from $6 to $9 per square foot. Stucco is great for insulation and is fire-resistant, but it can be prone to cracking if not installed perfectly. Integrating this unique finish often benefits from a holistic approach, which is where our design and build services can help ensure a flawless result.
What Really Drives Siding Installation Costs?
When you start budgeting for new siding, it’s easy to focus on the price per square foot of the material itself. But the final number on your quote is shaped by a handful of other important factors. Understanding these variables will help you see the full picture of your investment and plan your project with confidence. From the size and shape of your house to the condition of the walls underneath, several key elements influence the total cost.
Think of it less as a single price tag and more as a combination of services and materials tailored to your specific home. A straightforward, single-story ranch will have a different cost profile than a multi-level Victorian with intricate details. Let’s walk through the main factors that determine what your siding project will really cost, so you can feel prepared when you start gathering professional estimates.
Your Home’s Size and Shape Matter
It might seem obvious, but the single biggest factor influencing your total siding cost is the size of your home. The more exterior wall space you need to cover, the more materials and labor hours the project will require. We measure this in square footage. A larger home doesn’t just mean buying more siding panels; it also means more time for the crew to complete the installation. The number of stories also plays a role. Working on a second or third story requires additional equipment like scaffolding and extra safety precautions, which can add to the labor costs.
Factoring in Local Labor Rates
Where you live has a significant impact on installation costs. Labor rates vary from one region to another, and here in the Chicagoland area, you’ll find costs that reflect the skill and experience of professional crews. While you might see national averages ranging from $1 to $12 per square foot for labor, these are just a general guide. A reputable local contractor will give you a quote that accurately reflects the going rate for high-quality work in our area. This is one reason why getting a detailed, local home renovation quote is so important for accurate budgeting.
The Cost to Remove Your Old Siding
Before the beautiful new siding goes on, the old siding has to come off. This step is a crucial part of the process and adds to the overall project cost. The effort required for removal and disposal depends on the type of material currently on your home and its condition. Some materials are more difficult or time-consuming to remove than others. A professional team will handle this process efficiently, ensuring the old material is disposed of properly and leaving a clean slate for your new installation. Factoring this into your budget from the start prevents surprises down the road.
Wall Prep and Necessary Repairs
What lies beneath your old siding is a bit of a mystery until it’s removed. Once the walls are exposed, your contractor will inspect the sheathing or underlayment for any signs of damage, like rot or water intrusion. Any necessary repairs must be made before the new siding can be installed to ensure your home is protected. This is a critical step for the long-term health of your house. While it can be an unexpected expense, addressing these issues is far better than covering them up. This is where hiring an experienced design and build team pays off, as they can identify and fix problems correctly.
The Price of Architectural Details
Is your home a simple rectangle, or does it have lots of interesting angles, dormers, and gables? The architectural complexity of your house directly affects labor costs. A home with many corners, windows, and decorative trim requires more precise cuts and detailed work from the installation crew. Each of these features adds time to the project, as installers have to carefully work around them. While these details add character to your home, they also add complexity to the siding job. A skilled team has the expertise to handle these challenges, ensuring a flawless finish you can see in our project gallery.
How Much Does Siding Cost Per Square Foot?
The single biggest factor influencing your siding budget is the material you choose. From budget-friendly vinyl to classic wood, each option comes with a different price tag for both the materials and the installation. Understanding these differences is the first step in planning your project and is a key part of our design and build process. Let’s walk through the most common siding materials so you can see how their costs stack up.
How Much Does Vinyl Siding Cost?
If you’re looking for an affordable, low-maintenance option, vinyl is one of the most popular choices for a reason. It comes in a huge variety of colors and styles, including options that mimic wood grain, and it never needs to be painted. Cleaning is as simple as using a pressure washer on a low setting. For a professional installation, you can expect vinyl siding to cost between $4.15 and $15.25 per square foot. This wide range accounts for different qualities of vinyl, with thicker, insulated panels landing at the higher end of the scale.
What’s the Price Tag on Wood Siding?
For a timeless, traditional look, nothing beats the natural beauty of wood siding. It offers a warm, classic aesthetic but requires more maintenance, including regular staining or painting to protect it from the elements. The cost of wood siding has the widest price range, falling anywhere from $0.75 to $23.50 per square foot. This variation is due to the type of wood you select. Simple pine or spruce is more affordable, while more durable and rot-resistant options like cedar will be a larger investment.
The Cost of Fiber Cement Siding
Fiber cement siding offers the best of both worlds: the look of wood, masonry, or stucco with exceptional durability. It’s a composite material made from sand, cement, and cellulose fibers, making it resistant to fire, rot, and insects. This makes it a fantastic, long-lasting choice for Chicago’s varied climate. The installation cost for fiber cement typically runs from $5 to $14 per square foot. Brands like James Hardie are popular for their quality and extensive warranties, giving you peace of mind for decades.
How Much Should I Budget for Metal Siding?
Offering a sleek, modern look, metal siding is becoming increasingly popular for residential homes. It’s incredibly durable, low-maintenance, and resistant to fire and pests. You’ll generally choose between aluminum or steel. Aluminum siding costs between $6 and $10 per square foot and is lightweight and rust-proof. Steel siding is heavier and even more durable, with costs ranging from $7 to $16 per square foot. Both are great for creating a unique, contemporary exterior that stands up to harsh weather.
Understanding Stucco Application Costs
Stucco provides a beautiful, seamless, and durable finish that works well with many architectural styles, from Mediterranean to modern. It’s a cement-based plaster that is applied over a mesh lath, creating a solid shell over your home. Stucco is a great insulator and is resistant to fire and noise. The cost to install traditional stucco siding generally falls between $6 and $9 per square foot. The final price can depend on the complexity of your home’s design and the type of texture you choose for the finish.
Are There Hidden Costs When Installing Siding?
Budgeting for a siding project feels straightforward, but the number on your initial estimate might not tell the whole story. While a transparent contractor will give you a comprehensive quote, some costs simply can’t be predicted until the old siding comes off. Being aware of these potential expenses from the start helps you create a more realistic budget and prevents surprises down the road. A professional team will always communicate these issues with you as they arise, ensuring you’re in control of the project every step of the way. Here are some of the most common “hidden” costs that can pop up during a siding installation.
Don’t Forget Permits and Inspections
Before any work begins, your project will likely need a green light from your local municipality. Most siding replacement projects require a building permit to ensure the job complies with local codes for safety, structural integrity, and materials. The cost of the permit varies by location, but it’s a non-negotiable step. This process also involves scheduling inspections at certain stages of the project. While your contractor will handle the paperwork and logistics, the fees for the permit and the time involved are typically passed on to you as the homeowner. It’s a crucial part of a professional installation that protects your home’s value and ensures everything is done correctly.
Should I Upgrade My Insulation?
Once your old siding is removed, you have a golden opportunity to see what’s underneath. This is the perfect time to add or upgrade your home’s exterior insulation. While this is an additional cost, it’s an investment that pays you back over time. Upgraded insulation can significantly improve your home’s energy efficiency, keeping it warmer in the winter and cooler in the summer. This translates directly to lower utility bills and a more comfortable living space. The U.S. Department of Energy provides great information on how adding exterior wall insulation can create a thermal barrier, and doing it during a siding project is the most cost-effective time to tackle it.
The Cost of Trim and Finishing Touches
A siding job is more than just the panels on the walls. The finishing details are what create a polished, cohesive look. This includes the trim around your windows and doors, the soffits under the eaves, and the fascia boards along the roofline. If your existing trim is old, rotted, or simply doesn’t match your new siding, you’ll want to replace it. These materials and the detailed labor required to install them can add to the total project cost. Be sure to discuss these elements with your contractor to understand what’s included in your quote and what might be considered an add-on. A complete plan for these finishing touches ensures a beautiful final result.
Preparing for Unexpected Repairs
This is the biggest unknown in any siding project. Once the old siding is stripped away, it can sometimes reveal underlying problems like wood rot, water damage from old leaks, or even pest infestations. These issues absolutely must be addressed before new siding is installed. Covering up rot or moisture will only lead to more extensive and expensive problems later on. A trustworthy contractor will immediately stop work, show you the damage, and provide a clear change order detailing the necessary repairs and costs. While it’s not news anyone wants to hear, fixing these structural problems is essential for protecting the health and integrity of your home for years to come.
What About Debris and Disposal Fees?
All that old siding, trim, and construction material has to go somewhere, and responsible disposal comes with a cost. Your project will require a dumpster on-site to collect the debris, and there are fees associated with hauling it away and disposing of it at a proper facility. Most contractors will include this line item in their initial estimate, but it’s always a good idea to confirm. The cost can vary depending on the type of siding being removed—some materials are heavier or require special handling. Ensuring that debris disposal is part of the plan from the start helps keep the project site clean and avoids any surprise fees at the end of the job.
How Should I Budget for Labor vs. Materials?
When you receive a quote for a siding project, the total cost is essentially a combination of two key things: the materials themselves and the skilled labor required to install them. It’s a common misconception that this is a 50/50 split. In reality, the ratio can shift dramatically depending on the siding you choose and the complexity of your home. A high-end, difficult-to-install material might have labor costs that are just as high as the material cost, while a standard, easy-to-install vinyl might have a lower labor-to-material ratio.
Understanding how these two categories are priced is the first step to creating a realistic budget. Labor isn’t just about nailing boards to a wall; it covers everything from tearing off old siding to intricate cuts around windows and doors. Likewise, material costs aren’t just for the siding panels—they also include trim, house wrap, and fasteners. Thinking about your project in these two distinct parts will help you see where your money is going and make informed decisions for your home renovation. It allows you to weigh the benefits of premium materials against the costs of a more complex installation, ensuring you find the right balance for your home and budget.
What Goes Into Labor Costs?
Labor costs cover the expertise, time, and physical work required to properly install your new siding. This includes removing and disposing of your old siding, preparing the walls, making precise cuts, and ensuring every piece is securely and correctly fastened. The cost can range anywhere from $1 to $12 per square foot. This wide range is influenced by the type of siding—some materials are heavier or require more specialized tools—and the architectural details of your home. A simple, one-story rectangular house will have lower labor costs than a multi-story home with gables, dormers, and complex angles. Our design and build services account for these details from the start, ensuring a transparent and accurate labor estimate.
How Quality Affects Material Prices
The siding material you choose is one of the biggest factors in your total project cost. Prices vary significantly based on quality, durability, and style. For example, vinyl siding can cost anywhere from $2.50 to over $10.75 per square foot. The lower end might be a thinner, basic panel, while the higher end could be a thick, insulated siding designed to look like real wood. This principle applies to all siding types. When budgeting, consider both the upfront cost and the long-term value. A more durable, higher-quality material may cost more initially but can save you money over time on maintenance and repairs. You can see examples of different materials in our project gallery to get a feel for the finished look.
Why Labor Rates Vary by Location
Where you live plays a significant role in determining labor costs. Rates for skilled tradespeople vary from one region to another based on the local cost of living, market demand, and the availability of experienced installers. Here in the Chicagoland area, labor rates will naturally differ from those in a small rural town. That’s why online cost calculators can sometimes be misleading—they often use national averages that don’t reflect local market conditions. The best way to get a true sense of cost is to get a detailed estimate from a local contractor. This ensures the quote you receive is tailored to your specific project and geographic area. Feel free to contact us for a precise quote based on your home’s needs.
Which Siding Brands Offer the Best Value?
Choosing the right siding brand comes down to finding the sweet spot between cost, durability, and the look you want for your home. The best value isn’t always the cheapest option upfront; it’s the one that protects your home, looks great for years, and fits your budget. Different brands excel with different materials, so knowing the top players in each category can help you make a confident choice. Whether you’re drawn to the low maintenance of vinyl, the resilience of fiber cement, or the classic charm of wood, there are standout brands known for delivering quality products. We’ll walk through some of the most trusted names to help you find the perfect fit for your home renovation project.
Best Value Vinyl Siding Brands
Vinyl siding is a popular choice because it’s affordable, durable, and comes in a huge variety of colors. If you’re leaning this way, Alside is a brand worth looking into for its budget-friendly options and impressive color selection. Their Charter Oak® line is particularly noteworthy for its reinforced panels and a lifetime fade warranty. Another top contender is Mastic, which consistently receives high praise for its quality and performance. When you want a reliable, low-maintenance exterior that holds its color and stands up to the elements, these brands are excellent starting points.
Go-To Brands for Fiber Cement Siding
For homeowners who prioritize extreme durability, fiber cement is tough to beat. This material is engineered to withstand harsh weather, pests, and even fire. James Hardie is the most recognized name in this category, known for its incredible resilience and long-lasting performance, making it a smart long-term investment for your home. Another excellent option is LP SmartSide, which offers engineered wood siding with similar durability and a beautiful, high-end look. These premium siding brands are ideal if you’re looking for a robust solution that will protect your home for decades.
Trusted Wood Siding Manufacturers
Nothing beats the timeless, natural beauty of wood siding. If you love that classic aesthetic but worry about maintenance, modern manufacturers have made huge strides in durability. LP Building Solutions is a leader in this space with its engineered wood products, designed to resist moisture and decay far better than traditional wood. CertainTeed is another well-regarded brand that offers beautiful wood siding combining traditional charm with modern performance. These brands allow you to get the authentic look of wood without the constant upkeep, which you can see in our project gallery.
A Closer Look at the Siding Installation Process
Choosing your siding material is the fun part, but the installation process is where the magic really happens. A flawless installation is what ensures your siding not only looks fantastic but also performs its most important job: protecting your home. Even the highest-quality material will fail if it’s not installed correctly. This is why the details matter so much, from preparing the walls to the specific way each nail is hammered. Understanding the key steps can help you appreciate the craftsmanship that goes into a professional siding job and know what to look for in a quality installation. Let’s break down what a proper siding installation looks like, step by step.
Foundational Concepts and Wall Preparation
Before a single panel of new siding goes up, a lot of critical prep work needs to happen. This foundational stage is all about creating a protective, stable surface to ensure your home stays dry and your siding lasts for decades. It involves understanding how siding works as part of a larger system and meticulously preparing the walls. Think of it as setting the stage for a successful performance; without this careful preparation, the final result just won’t hold up. This is where the expertise of a professional team makes all the difference in a home renovation.
Why Siding is a Rain Screen, Not a Waterproof Barrier
It’s a common misconception that siding creates a completely waterproof seal around your home. In reality, most siding—especially vinyl—is designed to function as a rain screen. This means its primary job is to shed the vast majority of water, but it’s not completely impermeable. It’s built to allow the wall structure underneath to breathe and dry out if any moisture gets behind it. This design prevents moisture from getting trapped, which could lead to rot and mold, ensuring the long-term health of your home’s structure.
The Critical Role of a Weather-Resistant Barrier
Since the siding itself isn’t a waterproof seal, the layer underneath it is incredibly important. This is the weather-resistant barrier (WRB), often called house wrap. This material is the true protector of your home’s structure. It’s installed directly against the sheathing of your house, creating a continuous barrier that stops water from getting in but allows water vapor to escape. The siding, WRB, and flashing all work together as a complete system to keep your home safe and dry from Chicago’s unpredictable weather.
Proper Flashing Techniques for Water Management
Flashing is a crucial, yet often overlooked, component of the system. These thin pieces of waterproof material, typically metal, are installed around windows, doors, and where walls meet the roof. Their job is to direct water away from the most vulnerable points of your home. Without proper flashing, water can easily find its way behind your siding, leading to serious damage. A professional installer knows that meticulous flashing is non-negotiable for a long-lasting siding job and a key part of a quality installation.
The Step-by-Step Installation Sequence
Once the walls are prepped and protected, the installation of the siding itself can begin. This process is methodical and follows a specific order to ensure a level, secure, and beautiful finish. Installers work from the bottom up, carefully locking each piece into place and planning for the unique features of your home. Every step builds on the last, from creating a level foundation to finishing the final row. This systematic approach is key to achieving the clean, professional look you see in our project gallery.
Setting the Foundation with a Starter Strip
The entire siding installation depends on getting the first row perfectly level. To do this, installers snap a chalk line around the base of the house and attach a starter strip along that line. This piece is what the bottom of the first row of siding panels will lock into. If the starter strip isn’t perfectly straight, every single row above it will be crooked, so taking the time to get this step right is essential for a professional-looking result that stands the test of time.
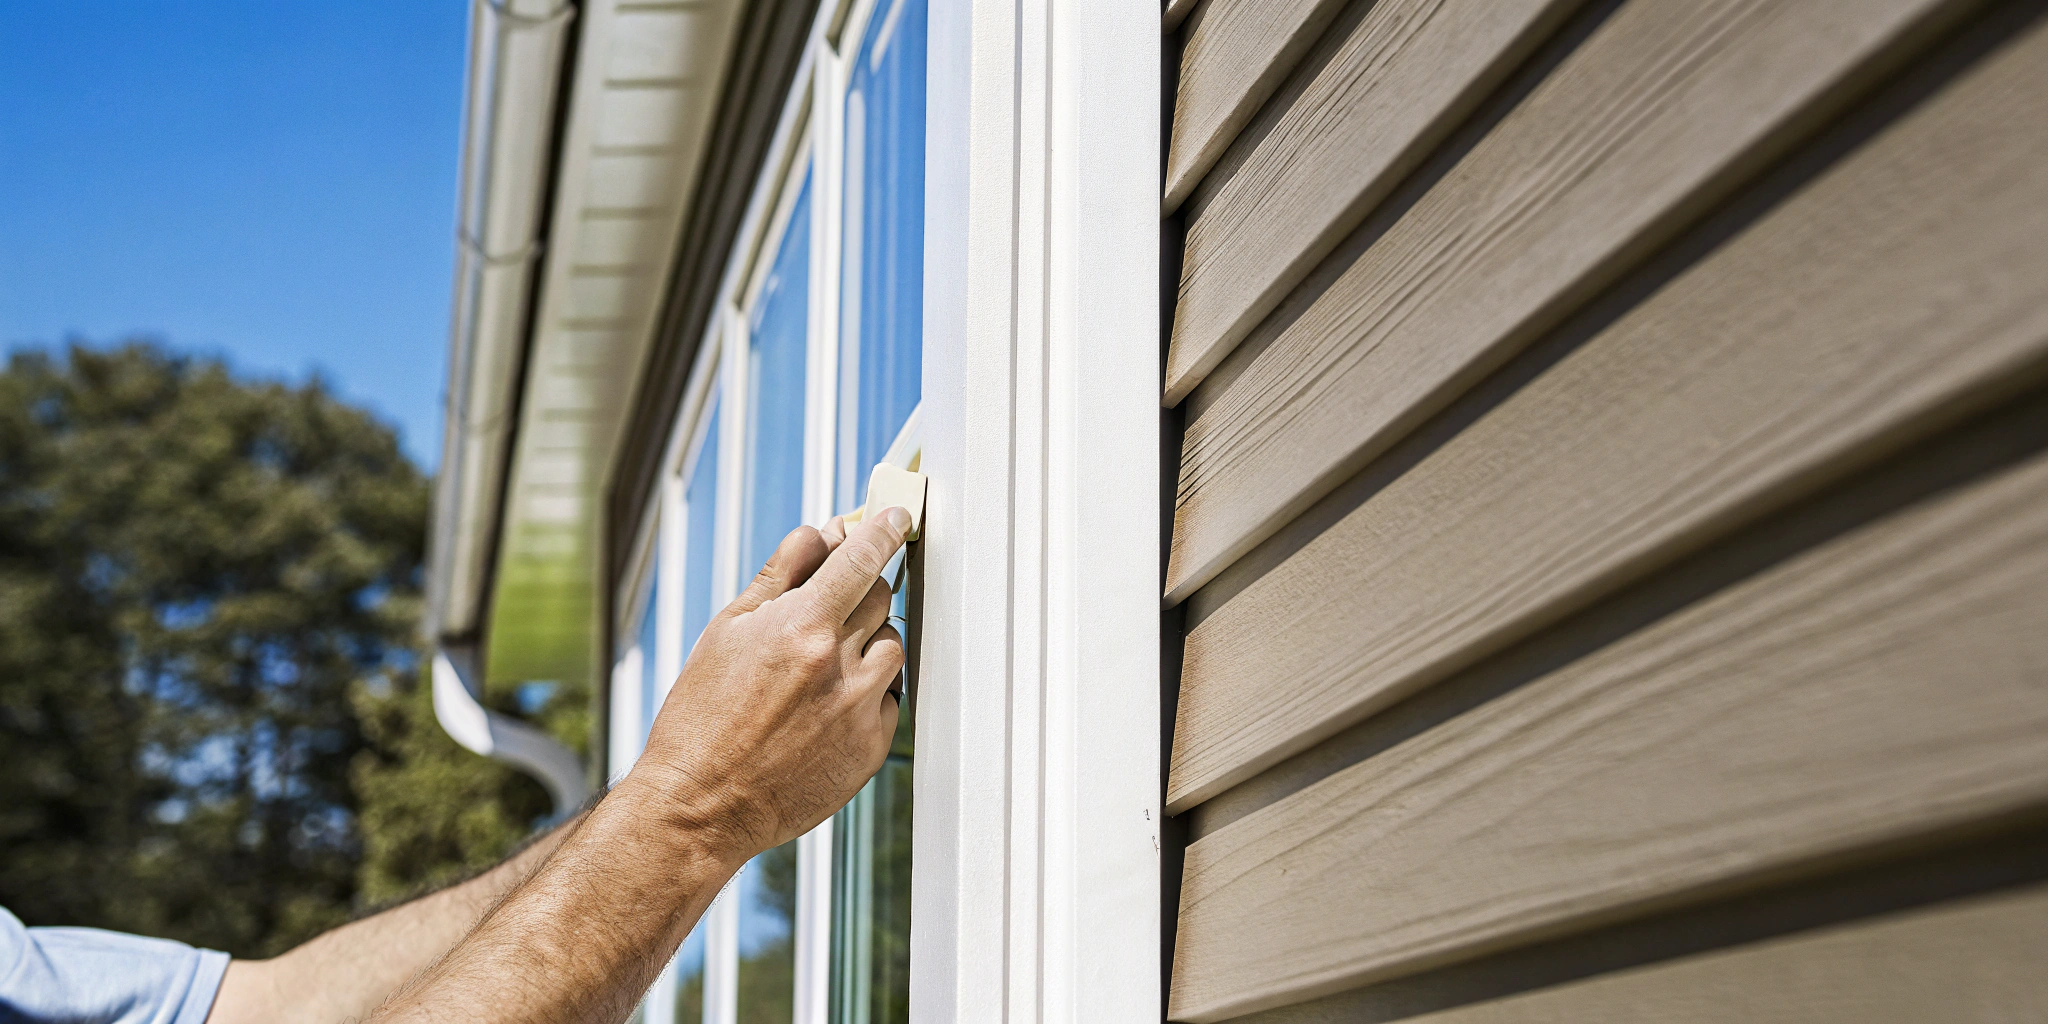
Installing Trim and Corner Posts First
Before the main siding panels are hung, the finishing pieces are put in place. This includes the corner posts that cap the outside and inside corners of your home, as well as the J-channel trim that frames windows and doors. These pieces create clean, finished edges and also serve as the channels into which the siding panels will fit. They are installed first to create a neat and tidy framework for the rest of the installation, ensuring a polished final appearance.
Hanging and Overlapping Siding Panels
With the trim in place, it’s time to hang the siding. Starting at the bottom, the first panel is locked into the starter strip and nailed to the wall. Each subsequent panel interlocks with the one below it as the installers work their way up. Where two panels meet in a long run, they must be overlapped by at least one inch. This overlap is carefully planned to be staggered across the wall, ensuring that water running down the surface can’t get behind the seams.
Finishing the Top Row Securely
The very last row of siding, right up against the soffit or roofline, requires a special technique. Since there’s no room to nail it at the top through the nailing hem, a piece of utility or under-sill trim is installed first. The top edge of the final siding panel is then cut to fit and punched with a snap-lock tool, which creates raised tabs. These tabs snap securely into the under-sill trim, holding the top row firmly in place without any visible fasteners for a clean finish.
Mastering Nailing and Fastening Techniques
How the siding is nailed to your house is just as important as the material itself. This is especially true for vinyl siding, which needs to move freely as temperatures change. Improper nailing is one of the most common causes of siding failure, leading to wavy, buckled, or cracked panels. Mastering these fastening techniques is a hallmark of a professional installation and is critical for the siding’s performance and longevity. It’s a science that our design and build team has perfected over countless projects.
The “Golden Rule” of Nailing for Expansion
Vinyl siding expands and contracts with temperature fluctuations. To allow for this movement, it must be hung loosely on the nails. This is the “golden rule” of installation. If the panels are nailed too tightly to the wall, they can’t move freely. When the temperature rises and the vinyl expands, it will have nowhere to go and will buckle or warp. A professional installer knows to leave the siding loose so it can perform as designed through every season.
Correct Nail Placement and Spacing
Proper nailing technique involves more than just how tight the nail is. According to the Vinyl Siding Institute, nails should be placed in the center of the nailing slot, not at the ends. This allows the panel to shift left and right as it expands and contracts. It’s also crucial not to drive the nail head completely flush against the siding. A small gap, about the thickness of a dime, should be left between the nail head and the vinyl to avoid restricting movement.
Leaving Room for Expansion Gaps
To accommodate expansion, installers must also leave a small gap—typically about 1/4 inch—wherever a siding panel meets a corner post or J-channel. This space gives the panel room to grow in length on hot days without binding against the trim. In colder weather, this gap might be increased slightly to account for more significant expansion when summer arrives. Forgetting these gaps is a surefire way to end up with buckled siding, which is why this detail is so important.
Should I DIY or Hire a Professional?
Deciding whether to tackle a siding project yourself or bring in a professional is one of the biggest choices you’ll make. It’s tempting to see the potential savings of a DIY project, and for some smaller jobs, it can be the right move. But residing your entire home is a massive undertaking that goes far beyond just nailing up some panels. It requires precision, specialized tools, and a deep understanding of how to protect your home from the elements. A small mistake can lead to big problems down the road, like water intrusion, mold, or poor energy efficiency.
Before you commit to spending your weekends on a ladder, it’s important to weigh the true costs against the benefits. This isn’t just about the price of materials versus labor. It’s about the value of your time, the quality of the final result, and the long-term security of your home. A professional installation is an investment in craftsmanship and peace of mind, ensuring the job is done right the first time. We’ll walk through what each path looks like so you can make the best decision for your home and your budget.
The Real Cost of a DIY Siding Project
Going the DIY route can seem like a great way to save money, especially if you have some construction experience. However, the sticker price of materials is only part of the story. You’ll also need to buy or rent specialized tools, like a nail gun, scaffolding, and siding cutters. Then there’s the time commitment—a siding project can take weeks of your free time. Mistakes can be costly, potentially leading to water damage or an improper seal that compromises your home’s insulation. You’re also responsible for permits, debris disposal, and any repairs for underlying issues you might uncover. The real challenge is achieving a professional finish that not only looks great but also protects your home for years to come.
Essential Tools and Materials You’ll Need
Beyond the siding panels themselves, a successful installation requires a specific set of tools. You’ll need the basics like a hammer, level, and tape measure, but the list doesn’t stop there. You’ll also need specialized equipment like a zip tool for removing old vinyl, tin snips for cutting trim, and a saw with the right blade for clean, precise cuts. You can’t just use any fasteners, either; you’ll need special galvanized roofing nails with large, flat heads. This is critical because siding needs to expand and contract with temperature changes, and the wrong nail can cause it to buckle or warp. The cost of buying or renting all this gear adds up quickly and is a crucial part of the true DIY budget.
Safety Risks and the Need for a Helper
Handling long, flexible siding panels is a two-person job at a minimum. Trying to manage a 12-foot panel by yourself while standing on a ladder is not just difficult—it’s dangerous. Safety is a major concern in any siding project. Working high off the ground on ladders or scaffolding requires experience and a steady hand, as a fall can lead to serious injury. A professional crew has the training, safety equipment, and teamwork to manage these risks efficiently. Before you decide to go it alone, honestly assess the heights and angles involved with your home and consider the very real safety risks.
Why Hiring a Professional Pays Off
Hiring a professional contractor turns a complex project into a streamlined process. An experienced team brings efficiency, expertise, and the right equipment to handle the job safely and correctly. We manage everything from removing the old siding and inspecting for damage to installing the new material with precision. A professional home renovation ensures your siding is weathertight, properly insulated, and meets all local building codes. You also get the peace of mind that comes with a warranty on both materials and labor. While you pay for labor, you’re investing in quality craftsmanship that protects your home’s value and saves you from future headaches and costly repairs.
When Does DIY Siding Make Sense?
A DIY siding project can be a practical choice in a few specific situations. If you’re only replacing a few damaged panels or siding a small, simple structure like a shed, doing it yourself can be a manageable weekend task. It’s also more feasible if you have legitimate, hands-on construction experience and already own most of the necessary tools. For a successful DIY outcome, it’s best to choose a siding material that is known for being user-friendly, like vinyl. For a full-house installation with architectural complexities, however, the risks and workload typically make hiring a professional the smarter, safer option.
How Can I Get an Accurate Siding Quote?
You’ve researched materials and have a vision for your home’s new look. Now comes the big question: what will it actually cost? While it’s tempting to plug numbers into an online tool, a truly reliable quote requires a more hands-on approach. Getting an accurate estimate is the most critical step in planning your budget and ensuring there are no surprises down the road. Here’s how to get a number you can trust.
The Limits of Online Siding Calculators
Online siding calculators seem like a great first step. You enter your home’s square footage, pick a material, and get an instant estimate. The problem is, these tools can’t see your home. They provide a generic guess that often misses the details that have a major impact on the final price. The cost of siding a house is more than just materials and labor. A calculator doesn’t know if the wall sheathing underneath your old siding is rotted, if you have complex architectural features like gables and dormers, or the specific permit fees in your town. Think of these tools as a very rough ballpark figure, not a number to build your budget around.
Why You Need an On-Site Estimate
To get a quote you can actually rely on, you need a professional to conduct an on-site evaluation. This is the only way to get a complete picture of the project’s scope. A reputable contractor will visit your home, take precise measurements, inspect the condition of your existing walls, and discuss your material options. They can identify potential issues before they become costly surprises and provide a detailed, itemized quote that breaks down costs for labor, materials, permits, and debris removal. This professional assessment is crucial for understanding the true investment in terms of cost, quality, and time. It’s the foundation of a successful home renovation project and gives you the clarity needed to move forward with confidence.
What to Ask Your Siding Contractor
Once you have a few professional estimates in hand, you need to compare them effectively. A lower price doesn’t always mean a better deal. Asking the right questions helps you understand exactly what you’re paying for and the quality of work you can expect.
Be sure to ask:
- Is this quote itemized and all-inclusive? Does it cover permits, cleanup, and disposal fees?
- What specific brand and type of siding are you recommending, and why is it a good fit for my home and budget?
- What does the warranty cover for both the materials and your workmanship?
- Can you provide a projected timeline from start to finish?
- What are some potential issues that could arise and affect the final cost?
A trustworthy contractor will welcome these questions and provide clear, thorough answers. Seeing their past work in a project gallery can also give you a great sense of their craftsmanship.
Common Siding Budget Mistakes (And How to Avoid Them)
Budgeting for a big project like new siding can feel like a moving target. But with a little foresight, you can avoid the common pitfalls that catch homeowners by surprise. It’s all about looking at the big picture and understanding what goes into a quality installation. Let’s break down a few key mistakes we see and, more importantly, how you can sidestep them to keep your project on track and your budget intact.
Mistake #1: Underestimating the Full Scope
It’s easy to get a quote for siding and think that’s the final number. But the cost of a siding project goes beyond just the boards and the labor to hang them. When you’re planning your budget, remember to account for things like insulation, house wrap, trim, and soffits. For example, the choice of insulation can affect your total cost while also making a huge difference in your home’s energy efficiency. A thorough contractor will include these items in their estimate, ensuring your home is protected and properly finished.
Mistake #2: Choosing the Cheapest Bid
Everyone loves a good deal, but when it comes to your home, the lowest bid isn’t always the best value. An unusually low quote might mean a contractor is cutting corners on materials, skipping crucial prep work, or isn’t properly insured. A higher quote often reflects a more comprehensive approach, including essential layers like weatherproofing and proper drainage that protect your home for years to come. Understanding the difference between a “budget” job and a quality installation from a trusted design and build team is key to a successful project that lasts.
Mistake #3: Forgetting About Future Maintenance
The initial installation cost is just one piece of the puzzle. The siding material you choose will also have long-term maintenance costs associated with it. While materials like fiber cement might have a higher upfront price, their durability and low maintenance can save you money over time compared to wood siding that needs regular painting or staining. Investing a bit more in upgraded weatherproofing or insulation can also lead to significant savings on your energy bills. Thinking about the total cost of ownership, not just the installation price, will help you make the smartest investment for your home.
How to Save on Your Siding Project Without Cutting Corners
A new siding project is a major investment, but that doesn’t mean it has to drain your bank account. With a bit of planning, you can significantly reduce costs without compromising on the quality or longevity of your home’s exterior. It’s all about making smart, informed decisions from the start. Instead of just looking for the lowest bid, focus on finding the best value. Here are a few practical ways to save on your siding project while ensuring you get a beautiful, durable result that you’ll love for years to come.
Get Smart About Timing Your Project
One of the simplest ways to save money is by scheduling your project during a contractor’s slower season. Most homeowners plan exterior renovations for the spring and fall, which means demand—and often labor rates—are at their peak. By booking your siding installation for the late fall or winter, you may find more competitive pricing and greater availability. With labor costs making up a significant portion of the total price, even a small reduction in the hourly rate can add up to substantial savings across the entire project. Talk to your contractor about their schedule and see if there’s a less busy time that works for both of you.
Select Smart, Cost-Effective Materials
The material you choose has the biggest impact on your budget. While premium options like wood or stone look incredible, they come with a high price tag. For a balance of beauty, durability, and affordability, it’s hard to beat vinyl. Modern vinyl siding comes in a huge variety of colors and styles, including options that mimic the look of real wood without the constant maintenance. It’s resistant to pests and moisture and won’t chip or crack easily, saving you money on future repairs. By opting for a cost-effective yet high-quality material, you can achieve a stunning look that fits comfortably within your budget.
Why Working With a Local Pro Saves Money
Working with a reputable local contractor is an investment that pays for itself. An experienced team knows the specific challenges of Chicagoland’s climate and can recommend siding materials and installation techniques that will stand up to our tough winters and humid summers. A pro can also spot potential issues with your home’s exterior before they become expensive problems. While a DIY approach might seem cheaper upfront, a professional home renovation ensures the job is done right the first time, protecting you from costly water damage, poor insulation, and other issues that can arise from an improper installation.
Look Into Your Financing Options
Don’t let a tight budget force you into choosing a subpar contractor or lower-quality materials. Many homeowners use financing to make their siding project more manageable. This allows you to get the high-quality installation you want now and pay for it over time in predictable monthly installments. Spreading the cost out can free up your budget to include important upgrades, like new insulation or trim, that will improve your home’s energy efficiency and curb appeal. When you contact us for an estimate, we can discuss your budget and help you understand the options available for funding your project.
Related Articles
- Vinyl Siding vs Fiber Cement: The Ultimate Guide
- Step-by-Step Vinyl Siding Installation Instructions
Frequently Asked Questions
How long does a typical siding installation take? The timeline for a siding project can vary quite a bit, but for an average-sized home, the entire process usually takes about one to two weeks. This includes the time needed to remove the old siding, make any necessary repairs to the walls underneath, and install the new material. The complexity of your home’s architecture and, of course, the weather can also influence the schedule.
Which siding material holds up best against Chicago’s weather? Chicago’s weather is no joke, so durability is key. Fiber cement is an outstanding all-around choice because it’s incredibly resistant to the moisture, freezing temperatures, and high winds we experience. It won’t rot, warp, or fall victim to pests. Insulated vinyl is another strong contender, offering great protection and energy efficiency, while metal siding provides exceptional strength against impact from things like hail.
Will new siding actually increase my home’s value? Absolutely. Replacing your siding is one of the smartest exterior upgrades you can make for your home’s value. It dramatically improves curb appeal, which is a huge factor for potential buyers. Beyond looks, new siding also protects the structural integrity of your home and can improve its energy efficiency. These are all major selling points that can lead to a significant return on your investment.
How much should I set aside for unexpected repairs found under the old siding? This is a great question because it’s the biggest variable in any siding project. A safe approach is to build a contingency fund of about 10-15% of your total project cost. This gives you a cushion to handle potential issues like wood rot or water damage without derailing your budget. A professional contractor will always alert you to these issues and provide a clear plan and cost for fixing them before moving forward.
Is there a big difference between insulated siding and adding new insulation separately? Yes, they serve slightly different purposes but work well together. Insulated siding has a layer of rigid foam insulation fused to the back of each panel, which helps reduce energy loss through the wall studs. Adding new insulation, like house wrap or rigid foam boards, is a separate step that creates a continuous thermal barrier across your entire wall before the siding goes on. For maximum energy efficiency, doing both is the most effective strategy.