
A new kitchen island can be a game-changer, but one of the biggest mistakes homeowners make is getting the planning phase wrong. An island that’s too large can make the room feel cramped, while one that’s poorly placed can disrupt the natural flow of your workspace. Getting it right means thinking through every detail beforehand, from traffic patterns and appliance clearance to plumbing and electrical needs. This article is designed to help you avoid those common pitfalls. We’ll guide you through the essential planning stages to ensure your kitchen island installation results in a feature that is both beautiful and perfectly functional.
Key Takeaways
- Prioritize Your Kitchen’s Flow: Before falling in love with a design, confirm you have at least 42 to 48 inches of clearance around the entire island. This ensures you can comfortably open appliance doors and move around without creating a bottleneck.
- Plan for Utilities from the Start: If your dream island includes a sink, dishwasher, or outlets, these plumbing and electrical needs must be part of the initial plan. Integrating them later is significantly more complex and expensive.
- Match the Installation to the Island’s Complexity: A simple, freestanding island can be a great DIY project. However, for custom islands, heavy countertops, or any utility hookups, hiring a professional is the best way to guarantee a safe, secure, and beautiful result.
Is a Kitchen Island the Right Choice for Your Kitchen?
A kitchen island can feel like the ultimate upgrade—a beautiful, functional centerpiece that serves as a hub for cooking, conversation, and daily life. It’s a standalone counter that can offer everything from extra prep space and storage to a casual spot for breakfast or homework. Before you start picking out countertops, though, it’s important to figure out if an island is truly the right fit for your home and your kitchen’s layout. The right island can transform your kitchen’s workflow, but the wrong one can create a cramped and awkward space.
The benefits are certainly appealing. A well-designed island adds valuable counter space, giving you more room to chop vegetables, roll out dough, or set down hot pans. It can also house essential appliances like a second sink, a wine fridge, or a cooktop. Plus, with added cabinetry and drawers, it provides much-needed storage. For many families, the biggest draw is the extra seating, which turns the kitchen into a social gathering spot. A great kitchen remodeling project puts function first, and an island can be a powerhouse of utility.
The most critical factor, however, is space. One of the biggest mistakes homeowners make is installing an island that’s too large, which disrupts the flow of the room. As a rule of thumb, you need at least 42 to 48 inches of clear walkway space on all sides of the island. This ensures you can comfortably open appliance doors, walk around without bumping into things, and have multiple people working in the kitchen at once. If your kitchen is less than 70 square feet, an island might not be the best option.
If your space is on the smaller side, don’t worry—you still have great alternatives. A peninsula, which is a counter extension connected to a wall, can provide extra workspace and seating without closing off the room. A mobile kitchen cart is another flexible choice, offering extra storage and prep area that you can move out of the way when needed. The goal is to enhance your kitchen, not just fill it. A thoughtful design and build service can help you explore all the possibilities and find a solution that perfectly matches your kitchen’s dimensions and your family’s needs.
What Are Your Kitchen Island Options?
Choosing a kitchen island isn’t just about adding more counter space; it’s about defining how you use your kitchen. The right island can become the central hub for cooking, dining, and gathering. Your decision will depend on your kitchen’s size, your family’s needs, and whether you’re looking for a permanent fixture or something more flexible. Let’s walk through the three main types to help you find the perfect fit for your home.
Mobile Kitchen Islands
If you love flexibility or have a smaller kitchen, a mobile island or cart is a fantastic choice. Think of it as a functional piece of furniture you can move wherever you need it. You can roll it out of the way to create more space for a party or position it closer to the stove for extra prep area. The best part? Mobile islands don’t require any complex installation. Since you don’t have to worry about connecting plumbing or electrical lines, you can add one to your kitchen without committing to a full renovation. It’s an easy, versatile solution for adding storage and workspace right away.
Fixed Kitchen Islands
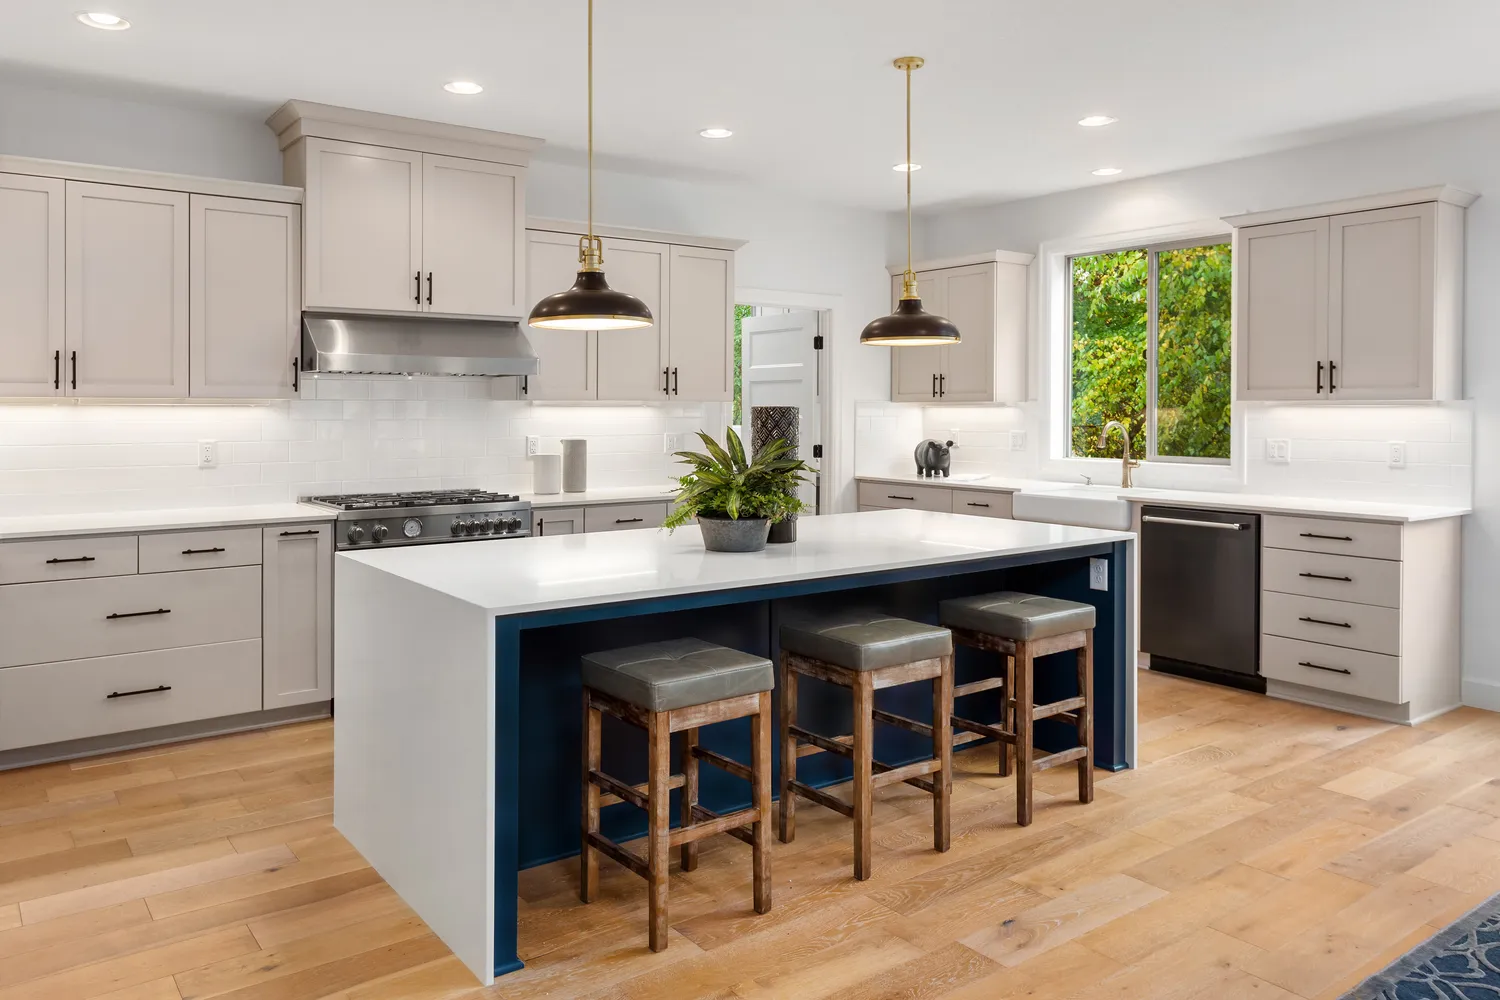
A fixed island is a permanent structure that becomes an integral part of your kitchen’s layout and design. It’s a substantial upgrade that can house sinks, cooktops, and provide dedicated seating. When it comes to installation, we recommend placing the island directly on top of your finished flooring. This creates a seamless look and protects your subfloor from any potential spills that might seep under the cabinets. A fixed island anchors the room and can dramatically improve your kitchen’s workflow, making it a cornerstone of our kitchen remodeling projects. It’s a solid investment in your home’s long-term function and value.
Multi-Functional Kitchen Islands
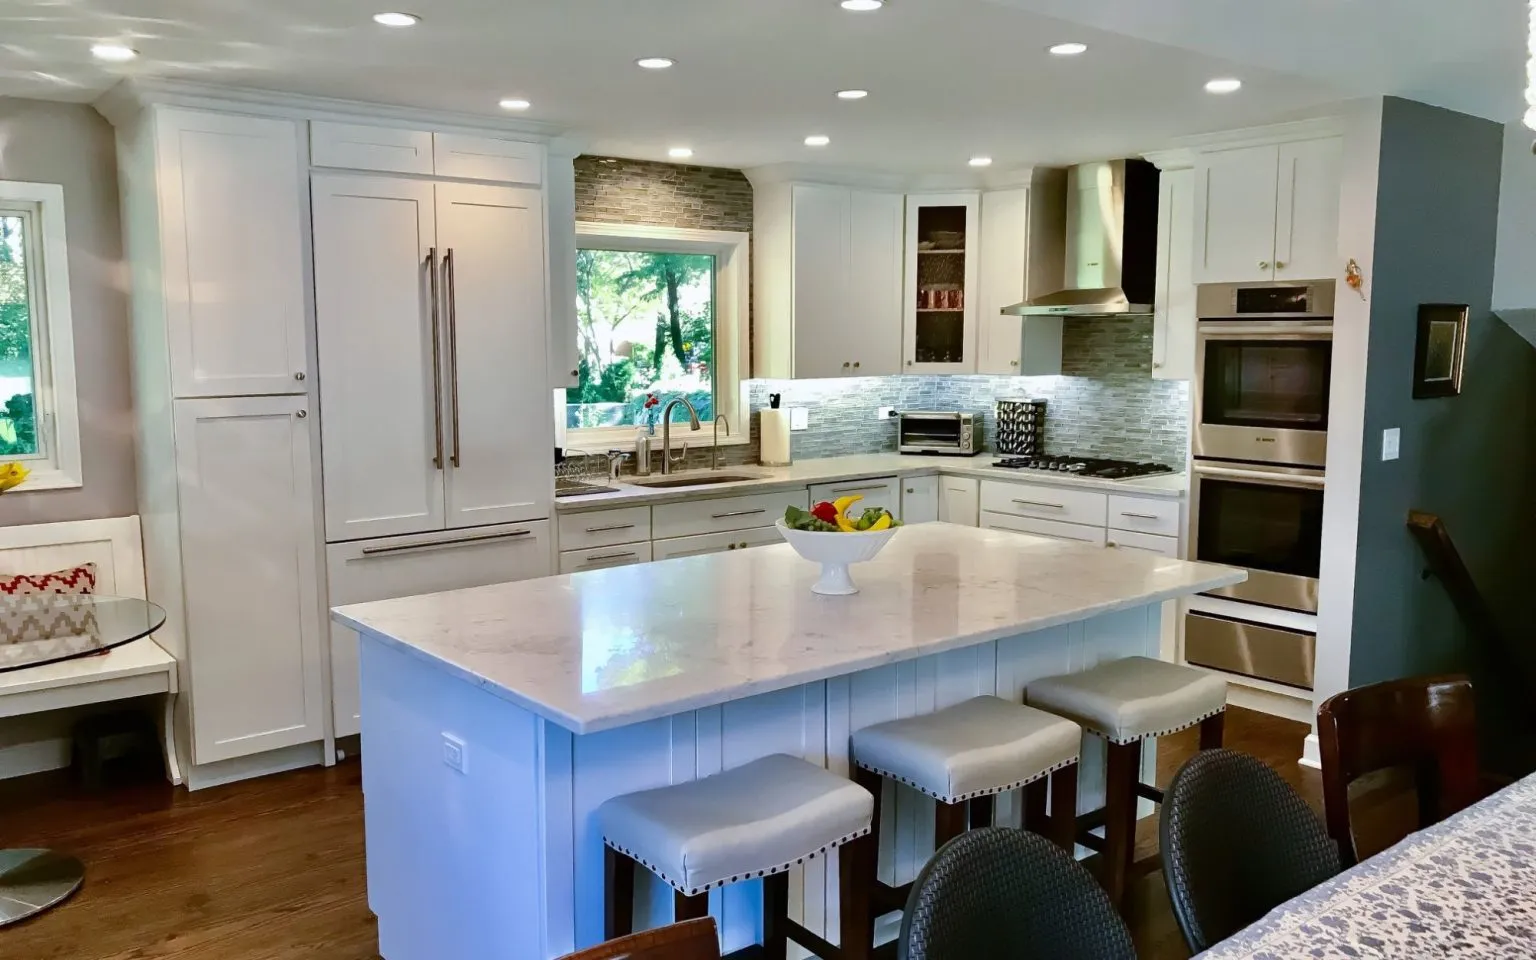
For those who want their kitchen to do it all, a multi-functional island is the ultimate workhorse. These islands are custom-designed to fit your lifestyle, combining several features into one streamlined unit. Imagine an island with a built-in microwave drawer, a dishwasher, hidden shelving for cookbooks, and a comfortable seating area for homework or casual meals. By integrating appliances and clever storage, you free up space in your main cabinets and create an incredibly efficient kitchen. Our design and build services can help you plan a multi-functional island that truly transforms your kitchen into the heart of your home.
How to Plan Your Kitchen Island Layout
A kitchen island can be the heart of your home, but a poorly planned one can quickly become a major roadblock. Before you even think about materials or installation, the most critical step is planning the layout. A successful layout enhances your kitchen’s workflow, provides functional space, and fits seamlessly into the room’s design. It’s all about creating a balance between adding valuable surface area and maintaining a comfortable, easy-to-use space.
Getting the layout right means thinking through how you actually live and work in your kitchen. Do you need more prep space, a casual spot for breakfast, or extra storage? Answering these questions will guide your decisions on size, placement, and features. Proper planning ensures your new island is a beautiful and practical addition, not a bulky obstacle. Our design and build services focus on creating these kinds of thoughtful, functional spaces that are tailored to your family’s needs.
Measure Your Kitchen Space
First things first: grab a tape measure. One of the most common mistakes homeowners make is choosing an island that’s simply too big for their kitchen. To avoid this, you need to work with the space you have. Start by measuring the total length and width of your kitchen. A good rule of thumb is to leave at least 42 to 48 inches of clearance on all sides of the island. This ensures there’s plenty of room to walk around, open appliance doors like the oven and dishwasher, and work comfortably without feeling cramped. A great way to visualize this is to use painter’s tape on the floor to mark out the potential footprint of your island. This simple trick helps you get a real feel for how much space it will occupy.
Map Out Traffic Flow and Clearance
Once you have your basic measurements, think about how people move through your kitchen. An island should improve your kitchen’s flow, not obstruct it. It shouldn’t overwhelm the space or create awkward bottlenecks between your main work zones—the sink, stove, and refrigerator. Make sure there’s a clear, easy path for everyday tasks. Can you carry a hot pot from the stove to the sink without navigating an obstacle course? Can someone grab a drink from the fridge while you’re loading the dishwasher? These practical considerations are key to a successful kitchen remodeling project. Your island should be a central hub, not a central hassle.
Determine the Right Height and Size
Bigger isn’t always better when it comes to kitchen islands. The island should be proportionate to the rest of your kitchen. An oversized island can make a room feel small and crowded, while one that’s too small can look out of place. The standard counter height is 36 inches, which is ideal for food prep. If you’re planning on adding seating, you might consider a two-tiered design with a 42-inch bar-height section. The depth of the island is also important; if it’s too wide, you won’t be able to reach the middle to clean it easily. Think about how you’ll use the island to find the perfect dimensions that complement your space and lifestyle. You can browse our gallery to see how we’ve tailored islands to fit kitchens of all shapes and sizes.
What to Know Before You Start Installation
Before you swing a hammer or even order your cabinets, a little bit of planning goes a long way. This is the phase where you iron out the critical details that ensure your new kitchen island is not only beautiful but also safe and functional. Thinking through the structural, mechanical, and legal requirements ahead of time saves you from costly surprises down the road. It’s about setting your project up for success from the very beginning. Getting these foundational elements right means the actual installation will be a much smoother and more enjoyable process.
Check for Structural Needs
One of the most common missteps in a kitchen remodeling project is choosing an island that’s too large for the room. A good rule of thumb is to leave at least 42 to 48 inches of clearance on all sides. This ensures you have plenty of space to walk around, open appliance doors, and work comfortably without feeling cramped. You also need to consider your floor. A large island, especially one topped with heavy quartz or granite, puts a lot of weight on the floor joists below. It’s important to confirm that your floor structure can handle the load before you begin installation.
Plan for Plumbing and Electrical
If your dream island includes a sink, dishwasher, or cooktop, you’ll need to plan for utilities. This isn’t something to figure out on the fly. Running new water supply lines, drains, and dedicated electrical circuits requires careful coordination and expertise. Before you finalize your layout, it’s a great idea to consult with a professional to map out your plumbing and electrical needs. Our design and build services can help you create a plan that seamlessly integrates these essential systems, making sure your island is as functional as it is stunning.
Understand Local Permits and Codes
Building codes exist to keep you and your family safe, and they often have specific rules for kitchen islands. For instance, most local codes require any fixed island to have at least one electrical outlet to prevent the unsafe use of extension cords. These regulations can vary between different towns in the Chicagoland area, covering everything from wiring methods to plumbing connections. Taking the time to understand these requirements is essential for a compliant and safe installation. If you’re unsure about the process, it’s always best to contact a professional who is familiar with local codes and can manage the permitting for you.
Your Step-by-Step Kitchen Island Installation Guide
Ready to get started? Installing a kitchen island is a multi-step process that requires careful planning and precision. Whether you’re tackling this as a DIY project or just want to understand what the process entails, this guide breaks down the key phases of a successful installation. From preparing the floor to connecting the final fixtures, each step builds upon the last to create a beautiful and functional centerpiece for your kitchen. Remember, while some steps are manageable for a seasoned DIYer, complex tasks involving plumbing and electrical work are often best left to professionals to ensure everything is safe and up to code.
Prepare Your Site and Floor
Before you bring in a single cabinet, you need to get your space ready. Start by carefully measuring your kitchen and marking the island’s exact location. A great way to visualize the footprint is to use painter’s tape on the floor to outline where the island will go. You can even stack some cardboard boxes to the height of your planned island to get a real feel for its size and how it will impact traffic flow. This simple step helps you confirm your measurements and ensures you won’t feel cramped later. Once you’re happy with the placement, clear the area completely and make sure the floor is clean, level, and ready for installation.
Assemble and Position the Cabinets
The foundation of your island is its base cabinets. For a straightforward project with a polished result, using pre-built kitchen base cabinets is the way to go. This approach saves you time and gives your island a clean, professional look without building from scratch. Carefully assemble your cabinets according to the manufacturer’s instructions. Once they’re built, move them into the taped-off position on your floor. Use a level to check that the cabinets are perfectly straight, using shims underneath to adjust for any uneven spots in your flooring. This step is critical for ensuring your countertop will sit flat and your island will be stable.
Secure the Island to the Floor
With your cabinets perfectly positioned and level, it’s time to make them permanent. The goal is to create a single, solid unit that won’t shift or wobble. Start by clamping the individual cabinets together and screwing them to one another through the side of the face frames. This creates a strong, unified base. Next, you’ll need to anchor the entire unit to the floor. You can do this by screwing 2×4 blocking to the subfloor inside the cabinet base, then fastening the cabinets to the blocking. This ensures your island is securely fixed and ready to handle the demands of a busy kitchen.
Install the Countertop
The countertop is where your island really comes to life. While it might be tempting to install it yourself, most countertop materials like quartz, granite, or marble require professional fabrication and installation to get a perfect fit, especially if you need cutouts for a sink or cooktop. Our design and build services can manage this process for you, ensuring a flawless finish. If you’re set on a DIY-friendly option, a butcher block countertop is your best bet, as it can be cut and finished with standard woodworking tools. Whatever you choose, make sure it’s properly secured to the cabinet base with adhesive and brackets.
Connect Plumbing and Electrical
If your island includes a sink, dishwasher, or outlets, this is the final and most technical step. Planning is key here. You’ll need to run plumbing and electrical lines from your walls or basement up through the floor and into the island’s cabinet base. Holes can be drilled through the bottom of the cabinets and your flooring after the island is set, but you must know exactly where to drill to avoid hitting floor joists. Because this work involves complex systems and strict safety codes, we always recommend hiring licensed professionals. A complete kitchen remodeling expert will ensure all connections are safe, functional, and compliant with local regulations.
How Much Does Kitchen Island Installation Cost?
Figuring out the budget for a new kitchen island is a crucial first step. The final cost can vary quite a bit, depending on the size, materials, and features you choose. Think of it as an investment in your kitchen’s functionality and your home’s overall value. A simple, prefabricated island might only cost a few hundred dollars, but a large, custom-built island with high-end finishes and built-in appliances can run into the tens of thousands.
The total price tag is a combination of three main things: the materials and cabinets you select, the cost of professional labor for installation, and any extra appliances or features you want to include. Understanding how these elements contribute to the overall cost will help you plan a project that fits your budget and gives you the kitchen you’ve always wanted. For a detailed and accurate estimate tailored to your space, it’s always best to get a professional quote. A well-planned budget is the foundation of a successful and stress-free kitchen remodel.
Budgeting for Materials and Cabinets
The core of your island’s cost lies in the materials and cabinetry. A custom-built kitchen island typically ranges from $3,000 to $5,000, but can easily exceed $10,000 for more complex designs with premium materials. Your choice between stock, semi-custom, or fully custom cabinets will be the biggest factor. Stock cabinets are the most affordable, while custom cabinets offer endless possibilities for size, style, and finish.
Beyond the cabinets, your countertop selection will significantly impact the budget. Materials like laminate or butcher block are on the lower end, while quartz, granite, and marble are premium choices that come with a higher price. Don’t forget to account for smaller details like hardware, decorative panels, and paint or stain, as these finishing touches also add to the final cost. You can explore a gallery of completed projects to see how different materials come together.
Understanding Labor and Professional Costs
While it might be tempting to focus only on material costs, professional labor is a critical part of your budget. Labor ensures your island is installed safely, securely, and correctly, especially if plumbing or electrical work is involved. The cost of labor covers everything from preparing the site and assembling the cabinets to perfectly leveling the countertop and connecting the utilities.
Hiring an experienced team for design and build services means you’re paying for expertise, precision, and peace of mind. A professional will ensure the island is properly anchored, all connections meet local building codes, and the final result is seamless and beautiful. While a simple, pre-made island can be a quick DIY fix, a permanent, multi-functional island requires a level of skill that guarantees it will last for years to come.
Accounting for Appliances and Features
If you want your kitchen island to be more than just extra counter space, you’ll need to budget for additional features and appliances. Integrating a sink, dishwasher, cooktop, or microwave drawer into your island can transform it into a highly efficient workstation. Each of these additions will increase the total cost, not just for the appliance itself but also for the necessary plumbing and electrical work.
You can also incorporate custom features like hidden storage, pull-out trash bins, a built-in wine fridge, or an extended countertop for bar-style seating. These elements add incredible functionality and can make your island the true centerpiece of your kitchen remodeling project. When planning, list out all the features you want so you can get a comprehensive estimate that includes every detail from the start.
What Tools and Materials Will You Need?
Getting your kitchen island installed correctly means starting with the right supplies. Whether you’re an ambitious DIYer gearing up for a weekend project or a homeowner who wants to understand what goes into a professional installation, knowing the required tools and materials is the first step. A well-stocked toolkit and carefully chosen materials are the foundation of a beautiful, functional island that will last for years. Below, we’ll walk through exactly what you’ll need to gather before any work begins.
Essential Tools for the Job
To get a professional-looking result, you’ll need more than just a hammer and a screwdriver. The most straightforward approach, especially for a DIY project, involves using pre-built kitchen base cabinets. This method simplifies the build and ensures a clean finish. To install them properly, you’ll need a core set of tools: a tape measure, a level, a pencil, a drill with various bits, and a circular saw. A stud finder will also be your best friend for locating floor joists. Having these items ready will make the entire kitchen remodeling process smoother and help you achieve a sturdy, level island.
A Checklist of Materials and Hardware
Beyond the tools, your shopping list will include the core components of the island itself. Start with your base cabinets—they come in various widths and styles, so you can mix and match them to create the perfect size and storage configuration. You’ll also need 2×4 lumber to create cleats, which are screwed to the floor to anchor the island securely. Don’t forget wood shims; these small wedges are essential for making sure your cabinets are perfectly level. Finally, gather the necessary hardware, including wood screws and construction adhesive. Proper material selection is a huge part of our design and build services.
Choosing Your Countertop and Finishes
This is where your personal style really comes to life. For the countertop, you’ll want something that can handle daily kitchen activities. Durable materials like quartz, granite, or solid surfaces are excellent choices because they resist scratches, stains, and heat. When it comes to finishes, think about how the island will complement the rest of your kitchen. Creating a contrast can make a beautiful statement—for example, a dark-stained island base can pop against lighter perimeter cabinets. You can explore our project gallery for inspiration on how different combinations of materials and finishes come together to create a stunning focal point.
Common Installation Mistakes to Avoid
A kitchen island can be the heart of your home, but a few common missteps can turn it into a major headache. The difference between a functional centerpiece and a bulky obstacle often comes down to careful planning and execution. Many of these mistakes happen long before the first cabinet is moved into place, starting with the design itself. Thinking through how you’ll use the space, how people will move around it, and what features you truly need will save you from costly and frustrating fixes down the road.
From getting the dimensions wrong to forgetting crucial electrical outlets, these errors are surprisingly easy to make. But the good news is they are just as easy to avoid. By learning from the most frequent installation blunders, you can ensure your new kitchen island works for you and your family for years to come. We’ll walk through the key planning and safety issues to keep on your radar so your project goes smoothly from start to finish.
Avoiding Design and Planning Errors
The most critical errors often happen on paper before any work begins. A common mistake is choosing an island that’s simply too large for the room. A good rule of thumb is to leave at least 42 to 48 inches of clearance on all sides to allow for comfortable traffic flow and for appliance doors to open fully. Another pitfall is not defining the island’s primary purpose. Will it be for meal prep, casual dining, or extra storage? Your answer will guide its design, from countertop material to the inclusion of a breakfast bar. A thoughtful layout is the foundation of any successful kitchen remodeling project, ensuring your island enhances your workflow rather than disrupting it.
Preventing Installation and Safety Issues
Once you have a solid design, it’s time to focus on a safe and functional installation. A frequent oversight is failing to plan for appliance clearance. Imagine installing a beautiful new island, only to find your dishwasher door hits the cabinets when you open it. Always measure your appliances with their doors fully open to prevent this. It’s also crucial to plan for plumbing and electrical needs from the start. Adding an outlet or a sink drain after the island is installed is far more complex and expensive. Finally, ensure the island is securely anchored to the floor, especially if it has a heavy stone countertop, to prevent any risk of tipping. You can see examples of professionally installed islands in our project gallery.
Should You DIY or Hire a Professional?
Deciding whether to install a kitchen island yourself or bring in a professional is a classic home improvement crossroads. The right path really depends on the complexity of your project, your comfort level with a toolbox, and the final look you want to achieve. Let’s break down when each approach makes the most sense for your home.
When a DIY Approach Makes Sense
A DIY installation can be a great choice for simpler projects. If you’re looking for a quick and affordable way to add counter space and storage, a pre-made, freestanding island or a kitchen cart is a perfect weekend project. These can often be assembled in just a few hours and immediately improve your kitchen’s functionality. For a more permanent solution, you could build an island using pre-built stock cabinets. This is a popular DIY route because it gives you a custom look without having to build the cabinet boxes from scratch. This approach works best when your island design doesn’t require new plumbing for a sink or complex electrical work for outlets or appliances.
Why Hiring a Professional is Often the Best Choice
If your vision includes a fully integrated, multi-functional island, hiring a professional is the best way to guarantee a flawless result. Custom islands, which are designed to fit the exact dimensions and style of your kitchen, require expert craftsmanship. A professional design and build service ensures your island is not only beautiful but also perfectly proportioned for your space and workflow. Furthermore, any island that includes a sink, dishwasher, cooktop, or electrical outlets requires licensed professionals to handle the plumbing and wiring safely and correctly. Professionals also specialize in installing countertops like granite or quartz, which require precise cutting and handling to prevent costly mistakes. By working with an experienced team for your kitchen remodeling, you get peace of mind knowing that every detail, from structural integrity to the final finish, is handled correctly.
Related Articles
- Kitchen Island Base Cabinets: The Complete Guide
- The Ultimate Kitchen Island with Seating & Storage Guide
Frequently Asked Questions
How can I be sure my kitchen has enough space for an island? The best way to get a real-world feel for an island’s footprint is to use painter’s tape on your floor. Mark out the dimensions of the island you’re considering, then live with it for a few days. Try opening your oven, dishwasher, and refrigerator doors. Walk around the taped-off area as you cook a meal. If you constantly feel like you’re squeezing by, your kitchen might be better suited for a peninsula or a mobile cart.
Can I add an island to my kitchen without redoing everything else? Absolutely. Adding a standalone island is a great way to improve your kitchen’s function without committing to a full-scale renovation. The key is to make it look intentional. You can do this by choosing a countertop material that complements your existing counters and selecting a cabinet color that either matches your current ones or creates a deliberate, stylish contrast.
What’s the most important thing to consider when choosing an island’s features? Before you get excited about wine fridges and built-in cooktops, think about your biggest daily frustration in the kitchen. Is it a lack of counter space for chopping vegetables? Not enough seating for your kids to do homework? Or maybe a desperate need for more storage? Your island’s primary job should be to solve your biggest problem first. Function should always guide your decisions.
How long does a professional kitchen island installation usually take? The timeline really depends on the complexity of the island. A simple, pre-built island with no utilities might be installed in a day or two. However, if your project involves running new electrical lines for outlets or plumbing for a sink and dishwasher, the process will take longer. A multi-functional island installation could span several days to ensure all the mechanicals are connected safely and correctly.
Is it better to match my island to my existing cabinets or make it a different color? There’s no right or wrong answer here—it’s all about the look you want to achieve. Matching your island to your perimeter cabinets creates a very cohesive, seamless design that feels classic and unified. Using a contrasting color or wood finish for your island, on the other hand, turns it into a beautiful focal point. This approach can add depth and personality to your kitchen.