
Have you ever seen vinyl siding that looks wavy, buckled, or just a little bit off? The problem often isn’t the siding material itself, but how it was installed. More specifically, the issue frequently comes down to an incorrect vinyl siding overlap. This seemingly minor detail is the key to a flawless, long-lasting exterior. When the overlap is too tight, panels can’t expand in the heat and start to warp. When it’s too loose, they can leave gaps in the cold, exposing your home to moisture. Understanding how this works is essential for any homeowner, as it’s the difference between a siding job that lasts for decades and one that needs repairs in just a few years. This is why professional installation is so critical for protecting your home renovation investment.
Key Takeaways
- Siding Needs Room to Breathe: The standard 1 to 1¼-inch overlap is designed to let vinyl panels expand and contract with Chicago’s weather. Without this space for movement, siding will inevitably buckle, warp, and ripple.
- Installation Details are Everything: A professional finish depends on precise techniques. Panels must be hung loosely by nailing in the center of the slot and leaving a small gap at trim pieces to allow for natural shifting.
- It’s a Water-Resistant System, Not a Seal: Vinyl siding is designed to direct water away and allow moisture to drain out. Never seal the overlapping seams with caulk, as this traps water and can lead to serious rot and mold damage.
What is Vinyl Siding Overlap?
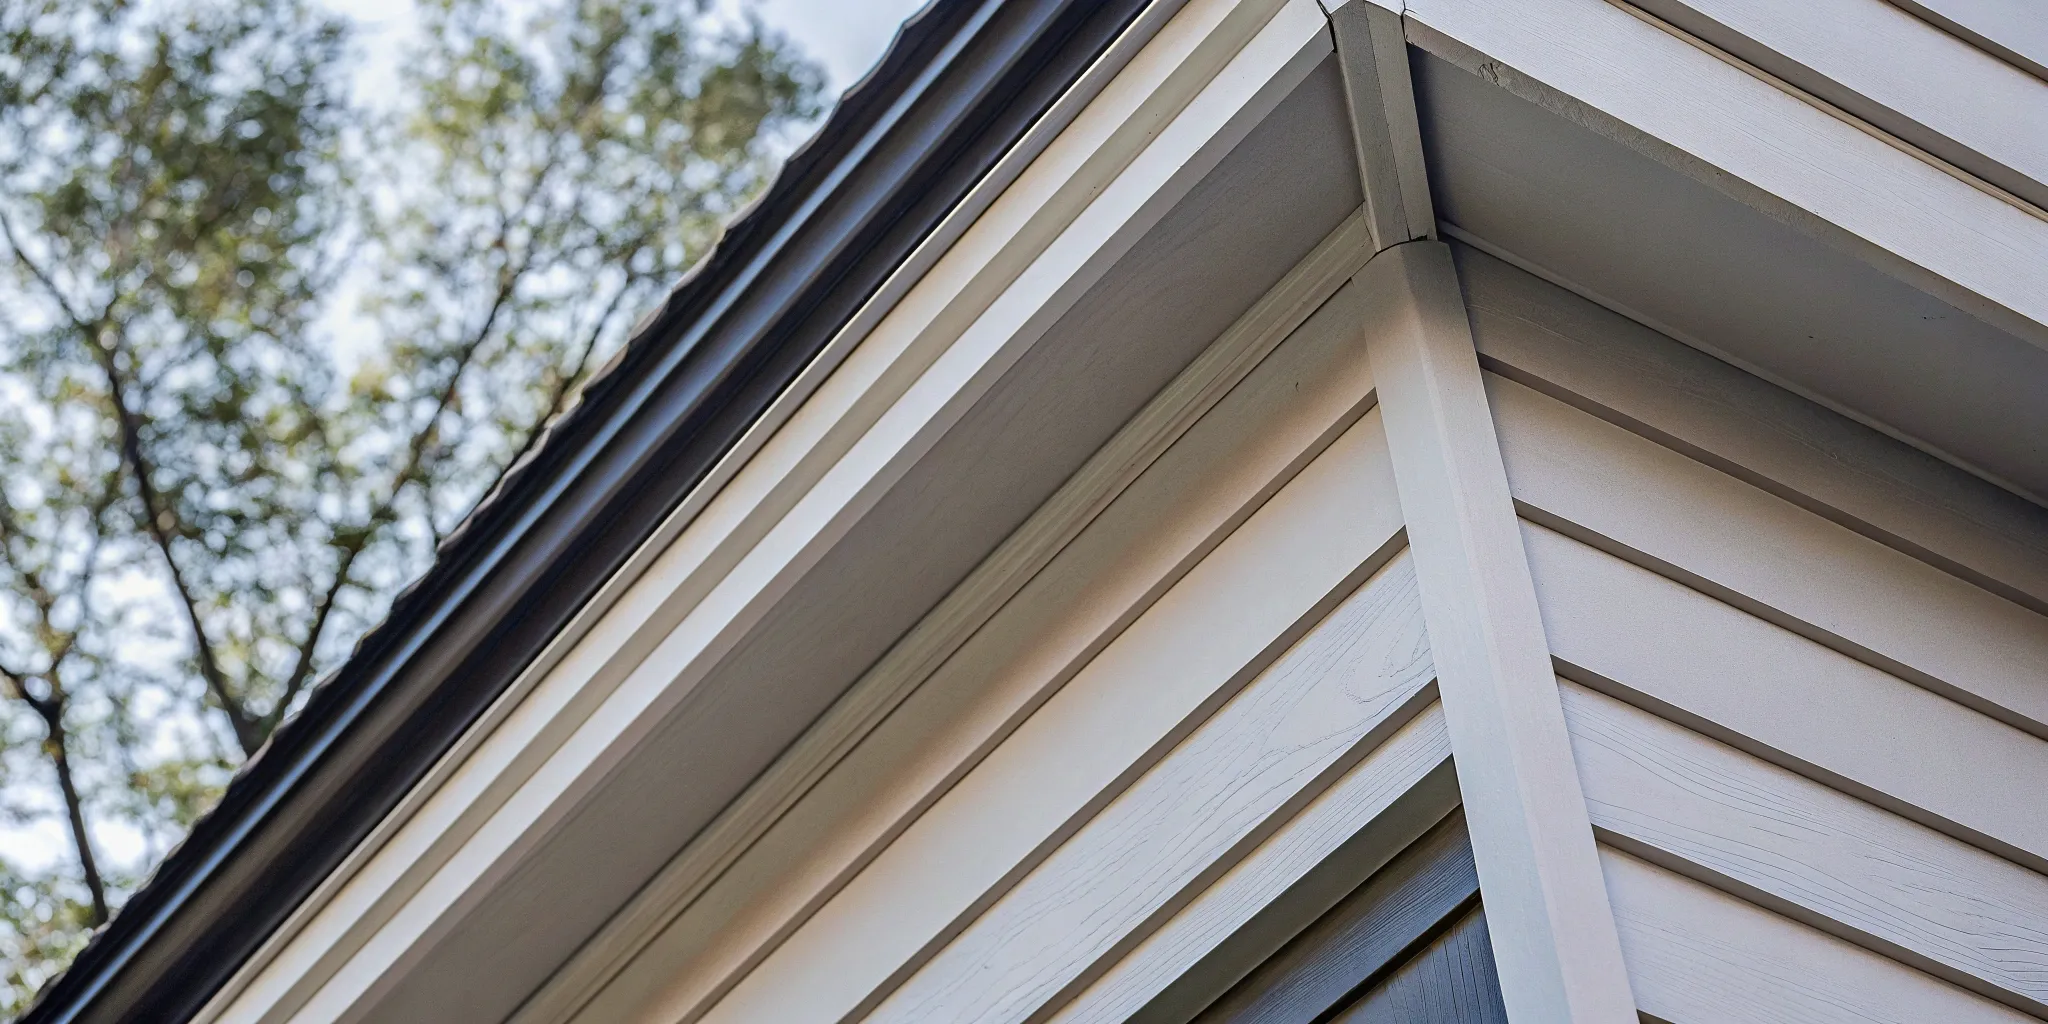
If you look closely at a house with vinyl siding, you’ll notice the panels don’t meet end-to-end. Instead, each panel slightly covers the one next to it. That small detail is vinyl siding overlap, and it’s a critical part of a correct and long-lasting installation. Think of it as a built-in safety net. Each panel is designed to overlap the next by about 1 to 1¼ inches. This specific measurement isn’t random; it’s the sweet spot that allows the siding to look seamless while giving it the flexibility it needs to respond to Chicago’s changing weather.
The main reason for this design is to accommodate the natural expansion and contraction of vinyl. As temperatures rise and fall throughout the year, the material expands in the heat and shrinks in the cold. Without that small amount of overlap, the panels would buckle under the summer sun or pull apart and create gaps in the winter. Getting this detail right is a hallmark of professional home renovations and is essential for maintaining both the appearance and integrity of your home’s exterior for years to come.
Its Role in a Proper Installation
A proper installation is all about letting the vinyl siding move freely. The overlap is central to this principle. When a new panel is installed, its bottom lock should snap securely into the top lock of the panel below it, but it should never be pulled tight or forced. The goal is to hang the siding, not pin it rigidly to the wall. That 1 to 1¼-inch overlap gives each panel just enough room to slide back and forth as temperatures fluctuate. When this is done correctly, the result is a smooth, uniform finish that you can see in our gallery of completed projects.
How It Protects Your Home from the Elements
Vinyl siding overlap is your home’s first line of defense against wind and rain. While the siding itself is water-resistant, it’s not a completely waterproof seal. The overlapping design works as part of a larger system to manage moisture effectively. Any wind-driven rain that gets behind a panel is directed down and out. This is helped by tiny weep holes at the bottom of each panel, which allow trapped water to drain away. Underneath it all, a water-resistant barrier like a house wrap provides a final layer of protection, ensuring any stray moisture never reaches your home’s structural walls.
How Much Should Vinyl Siding Overlap?
When it comes to installing vinyl siding, precision is everything. You might think that a little more or a little less overlap doesn’t matter, but getting this measurement just right is the key to a beautiful, durable exterior that stands up to Chicago’s weather. The goal is to find the sweet spot where panels are secure and weatherproof yet have enough room to respond to temperature changes without buckling or warping.
Think of it as giving your siding a little breathing room. By following a few key guidelines, you ensure your home’s exterior looks fantastic for years to come. It’s one of the most critical steps in a professional home renovation project involving new siding, and it’s what separates a DIY look from a flawless, expert finish. Let’s get into the specific measurements you need to know.
The Standard 1 to 1¼-Inch Rule
For most vinyl siding installations, the golden rule is to overlap each panel by 1 to 1¼ inches. This specific range is the industry standard for a reason. It creates a secure seam that keeps water out while preventing the panels from becoming too rigid. If the overlap is too tight, the siding can’t move freely, which often leads to a wavy, buckled appearance sometimes called “oil canning.”
This guideline generally applies to panels that are 12 feet 6 inches or shorter. Sticking to this measurement ensures each piece fits together snugly, creating a clean, uniform look across your home’s exterior. It’s a foundational step for a perfect vinyl siding installation that protects your home and maintains its curb appeal.
Adjusting for Temperature Changes
Vinyl is a dynamic material; it expands when it gets warm and contracts when it gets cold. Because of this, the temperature on the day of installation plays a huge role in how you should install your siding. You need to leave a small gap at the end of each panel where it meets trim or corner pieces to account for this movement.
If you’re installing siding on a warmer day (above 40°F), a 1/4-inch gap is sufficient. On a colder day (below 40°F), you’ll want to leave a slightly larger 3/8-inch gap. This extra space allows the panels to expand in the summer heat without pushing against each other and causing damage. Remember, one of the most common vinyl siding installation mistakes is nailing panels too tightly, which completely restricts this essential movement.
How Proper Overlap Prevents Costly Problems
Getting vinyl siding overlap right is about more than just curb appeal—it’s one of the most important factors in protecting your home from the elements and avoiding expensive repairs. When installed correctly, the overlap allows the siding to function as a complete system, defending against temperature swings, preventing ugly warping, and managing moisture effectively. Think of it as the built-in defense mechanism for your home’s exterior.
An improper overlap can lead to a domino effect of issues. Panels that are too tight can’t move, causing them to buckle under the summer sun. Gaps from too little overlap can expose the underlayment to rain and pests. This is why professional installation is so critical; it’s not just about hanging panels, but understanding the science behind how they work together. A small detail like a quarter-inch of space can make all the difference in the longevity and performance of your siding, ensuring your home renovation investment is protected for years to come.
Understanding Thermal Expansion and Contraction
It might sound technical, but the concept is simple: vinyl siding expands when it gets hot and shrinks when it gets cold. This movement is completely normal and expected. A quality installation is designed to accommodate this natural process. The key is to ensure the siding panels can move freely without restriction.
If a contractor nails the siding down too tightly, it pins the panel in place. When temperatures rise, the expanding vinyl has nowhere to go, which can cause it to ripple or warp. The overlap works with the nailing hem to let each panel slide back and forth slightly as the weather changes. This is why getting the details right is a non-negotiable part of a professional siding job.
Preventing Buckling and Warping
When vinyl siding can’t expand and contract properly, you’ll start to see buckling, warping, or visible waves along your walls. This is often a direct result of improper overlap. If the panels overlap too much, they can bind against each other, restricting the movement needed to lie flat. This pressure can cause what’s known as “oil canning,” where the flat part of the siding develops noticeable ripples.
To prevent this, professionals leave a specific gap to allow for movement, typically about 1/4 inch. This small amount of breathing room is enough to prevent the panels from buckling. You can see the difference a precise installation makes by looking at the clean, straight lines in a professional project gallery.
Stopping Moisture and Water Damage
A common misconception is that vinyl siding creates a completely waterproof barrier. In reality, it’s designed to be a water-resistant shield. It’s normal for a small amount of wind-driven rain to get behind the panels. A proper installation accounts for this by using the overlap to direct water down and away from the wall sheathing.
Each panel has small weep holes at the bottom to allow any trapped moisture to drain out. This is why you should never seal the overlaps with caulk. Sealing them traps water, which can lead to mold, rot, and serious structural damage over time. The entire system is designed to breathe and dry out, and the overlap is a crucial part of that process. If you’re concerned about your current siding, it’s always best to contact a professional for an inspection.
What Happens When Siding Overlap Goes Wrong?
Vinyl siding is a fantastic, low-maintenance choice for protecting your home, but its effectiveness hinges on proper installation. Getting the overlap just right isn’t just a matter of aesthetics; it’s crucial for the siding’s performance and longevity. When the overlap is off—either too much or too little—it can set off a chain reaction of problems that compromise your home’s exterior. These issues can range from unsightly warping to serious moisture damage that affects your home’s structure.
Think of your siding as a flexible shield. It needs to be secure enough to keep the elements out but have enough room to breathe and move with changing temperatures. When that balance is disrupted, the shield develops weak points. An incorrect overlap can create gaps for water to seep in, restrict the natural movement of the panels, and put unnecessary stress on the material. These seemingly small installation mistakes are often the root cause of major siding failures down the road. That’s why professional home renovations that include siding replacement demand precision and expertise to ensure your home is protected for years to come.
Too Little Overlap: Gaps and Exposure
When vinyl siding panels don’t overlap enough, they leave small but significant gaps. While it’s normal for a bit of water to get behind siding—it’s designed with weep holes to let moisture drain out—insufficient overlap invites far too much water in. These gaps act as direct entry points for rain and melting snow, overwhelming the drainage system. This excess moisture gets trapped against your home’s sheathing, which can lead to wood rot, mold growth, and compromised insulation. What starts as a small installation error can quickly become a serious and expensive problem hidden just beneath the surface of your home’s exterior.
Too Much Overlap: Restricted Movement
On the flip side, overlapping the panels too much creates another set of issues. Vinyl naturally expands in the heat and contracts in the cold. A proper installation accounts for this movement. When panels are overlapped excessively, there’s too much material under the nail slot, which essentially pins the siding in place. This restriction prevents the panels from moving freely as temperatures fluctuate. The result is often visible buckling, warping, or a wavy appearance sometimes called “oil canning.” This not only detracts from your home’s curb appeal but also puts constant stress on the siding, which can lead to cracking over time.
Improper Nailing: Warping and Damage
The way siding is nailed is just as important as the overlap itself. Each panel should be hung from the nails, not fastened tightly against the wall. Driving the nails in too tight is a common mistake that prevents the siding from expanding and contracting. This pressure forces the panels to buckle and warp when the temperature rises. To allow for movement, installers should leave a small gap—about 1/32 of an inch—between the nail head and the siding. If you notice your siding is wavy, distorted, or making popping sounds, improper nailing could be the culprit. When you see these signs, it’s best to contact a professional to assess the situation before further damage occurs.
Essential Tools and Techniques for a Flawless Finish
Getting vinyl siding overlap right isn’t just about following a formula; it’s about using the right tools and techniques to execute the job perfectly. A flawless finish that stands the test of time comes down to precision and an understanding of how the material behaves. Before you even think about hanging the first panel, you need to plan your project and gather the proper equipment. This preparation is what separates a professional installation from a DIY job that might look good for a season but fails down the road. It’s the small details that make all the difference in protecting your home and making your siding look fantastic for years.
Must-Have Measuring Tools
Precision is everything when installing vinyl siding. You can’t just eyeball it and hope for the best. Your essential toolkit should include a quality tape measure, a long level (at least 4 feet), and a chalk line. The chalk line is your best friend for snapping straight, level guidelines across long walls, ensuring every course of siding is perfectly aligned. The level confirms that your lines are true, preventing a crooked or wavy appearance that can be surprisingly obvious from the street. These simple tools are the foundation of a professional-looking job, ensuring every panel is placed exactly where it needs to be for a clean, seamless look you can see in our project gallery.
Nailing Siding Correctly
How you nail the siding is one of the most critical steps. The key is to remember that vinyl siding needs to hang, not be pinned tightly to the wall. Always place your nails in the center of the nailing slot. This allows the panel to shift left and right as it expands and contracts. You should also leave a small gap—about the thickness of a dime or 1/32 of an inch—between the nail head and the siding. After nailing, you should be able to slide the panel back and forth slightly. This technique is fundamental to preventing warping and buckling, ensuring your home renovations look great for decades.
Leaving Room for Panels to Move
The most important rule in vinyl siding installation is to allow for movement. Vinyl expands in the heat and shrinks in the cold, and if it can’t move freely, it will buckle, warp, or even crack. This principle applies to more than just nailing. You also need to leave a small gap (typically ¼ inch) where the ends of the panels meet corner posts, window trim, and other accessories. This space gives the siding room to grow without pushing against obstacles. Ignoring this step is a common mistake that can lead to costly repairs. A commitment to getting these details right is what defines a quality contractor and ensures a durable, beautiful exterior for your home.
How to Overlap Vinyl Siding: A Step-by-Step Guide
Getting vinyl siding overlap right is a game of precision. It’s what separates a professional, long-lasting exterior from one that buckles and warps after a few seasons. The goal is to create a seamless, weatherproof barrier that can adapt to Chicago’s changing temperatures. Following a few key steps ensures every panel works together to protect your home while looking fantastic. It’s all about starting in the right place, measuring carefully, and securing each panel correctly to allow for natural movement.
Start at the Back for the Best Look
The secret to making siding seams virtually disappear is to think like a magician—it’s all about directing the audience’s eye. You should always start installing your siding at the back corner of your home that is least visible from the street or main outdoor living areas. By overlapping the panels away from high-traffic sightlines, you effectively hide the seams. For example, if your driveway and front door are on the left side of your house, you’d start at a back corner and work left. This ensures that anyone approaching your home sees the smooth face of the siding, not the edges. You can see this seamless effect in our project gallery.
Measure and Mark Your Overlap Zones
Precision is everything when it comes to the overlap itself. The industry standard is to overlap each panel by 1 to 1¼ inches. Any less, and you risk creating gaps as the siding expands and contracts. Any more, and you can restrict that natural movement, leading to buckling or warping. Before you hang a panel, measure and mark where the overlap will occur. This small step ensures consistency across the entire wall and is critical for the siding’s performance and longevity. It’s a detail that makes all the difference in a professional home renovation.
Secure Panels with Proper Spacing
How you nail the siding is just as important as the overlap. Each panel should be fastened through the center of its nailing slot, not at the ends. Most importantly, don’t drive the nail in tight against the panel. You need to leave a tiny gap—about the thickness of a dime (1/32 of an inch)—between the nail head and the vinyl. This space is crucial because it allows the siding to expand and contract freely with temperature shifts. Nailing it too tightly pins the panel in place, which is a primary cause of wavy, buckled siding.
How to Minimize Visible Siding Seams
Even with perfect overlap, vinyl siding panels have to end somewhere. The seams where two panels meet are a necessary part of the installation, but they shouldn’t be the first thing you notice about your home’s exterior. A skilled installation team knows how to make these seams practically disappear, creating a clean, uniform look that enhances your home’s curb appeal. When siding is installed correctly, you shouldn’t see the seams where panels join. Visible seams can detract from your home’s beauty and suggest a less-than-professional job.
The secret isn’t about eliminating seams entirely—it’s about strategic planning and meticulous execution. By carefully considering panel length, placement, and alignment, a professional can ensure the finished result is beautiful and cohesive. This attention to detail is what separates a standard siding job from a truly professional home renovation. When done right, the siding looks like a single, solid surface, protecting your home while looking fantastic. It’s these thoughtful techniques that contribute to a polished, high-quality finish that lasts for years and adds real value to your property. Below, we’ll cover the key methods professionals use to keep siding seams out of sight and out of mind.
Use Longer Panels to Reduce Seams
One of the most straightforward ways to get a cleaner look is to start with longer siding panels. In the past, standard panel lengths meant more seams were unavoidable, especially on long, uninterrupted walls. Today, manufacturers produce siding in extended lengths, which is a game-changer for creating a more seamless appearance. Using longer pieces simply means fewer joints are needed to cover a wall from end to end. This not only improves the final look but also streamlines the installation process for your contractor. It’s a simple change that makes a big visual impact.
Place Seams Away from High-Traffic Areas
A little bit of strategy goes a long way in hiding siding seams. The goal is to place them where they are least likely to be seen. Think about the main entry points and busiest spots around your house, like the front door, patio, or driveway. A pro will plan the installation so that the overlaps face away from these high-traffic viewpoints. This ensures that as you, your family, and your guests approach your home, your eyes aren’t drawn to the seams. It’s a subtle but effective technique that contributes to a flawless finish, which you can see in our project gallery.
Align Panels for a Seamless Appearance
Proper alignment is the final piece of the puzzle for making seams disappear. When vinyl siding is installed correctly, the seams should be staggered and tight, blending into the overall pattern of the siding. If you can easily spot the vertical lines where panels join, it’s often a sign of a rushed or inexperienced installation. Each panel must be perfectly level and locked into place to create that polished, uniform look. This precision ensures the siding not only looks great but also functions correctly, allowing for natural expansion and contraction without creating unsightly gaps or buckles.
Common Vinyl Siding Overlap Mistakes to Avoid
Getting vinyl siding overlap right is crucial for both the look and longevity of your home’s exterior. While it might seem straightforward, a few common installation errors can lead to significant issues like warping, water damage, and an uneven appearance. Knowing what to watch for is the first step in ensuring a flawless, durable finish. When you invest in a home renovation, you want every detail to be perfect, and the siding is no exception. Let’s walk through the most frequent missteps so you can understand what a professional installation should look like and why cutting corners is never a good idea.
Nailing Panels Too Tightly
One of the most critical mistakes is nailing panels too tightly. Vinyl siding is designed to move; it naturally expands and contracts with temperature changes. If panels are nailed flush against the sheathing, they can’t shift as needed. This restriction can cause the siding to buckle, warp, or even crack. Trapped moisture is another risk, as tight panels can prevent proper drainage and lead to rot in the wood structure underneath. A professional installer knows to leave a small gap—about a dime’s thickness—between the nail head and the vinyl to allow for this essential movement.
Overlapping in the Wrong Spot
The amount of overlap between siding panels is a precise measurement. The industry standard is an overlap of one to one-and-a-quarter inches. If panels overlap too much, it restricts their movement, which can cause unsightly waves or wrinkles known as “oil canning.” Too little overlap is just as bad, as it can create gaps when panels contract in cold weather, exposing the wall to the elements. Proper placement ensures your home is protected and the siding looks seamless, a key part of any quality home addition or exterior update.
Sealing the Overlaps
It might seem logical to seal the seams between siding panels with caulk, but this is a major mistake. Vinyl siding is engineered as a “weep” system, meaning the overlaps are intentionally left open to allow any water that gets behind the panels to drain out. Sealing these seams traps moisture, creating a perfect environment for mold, mildew, and rot to develop. This can cause serious damage to your home’s structure over time. A correctly installed siding system manages moisture on its own, proving that the best way to keep water out is to give it a clear path to escape.
How to Maintain Your Vinyl Siding Overlap
Once your vinyl siding is installed correctly, keeping it in great shape is relatively simple. A little bit of seasonal maintenance goes a long way in preserving its appearance and protecting your home. The key is to know what to look for and how to address minor issues before they become major headaches. Proper maintenance ensures your siding can continue to do its job: expanding and contracting with the weather while keeping your home safe from the elements.
Focusing on a few key areas will help extend the life of your siding and keep your home looking its best. Regular inspections for movement, proper cleaning techniques, and knowing when to bring in an expert are the pillars of good vinyl siding care. Think of it as a quick check-up for your home’s exterior that can save you time and money on future repairs.
Inspect for Movement and Alignment
One of the most important things you can do is periodically check that your siding panels can still move freely. Vinyl siding is designed to expand and contract with temperature changes, and if it’s nailed too tightly, it can’t shift as needed. This restriction can cause the panels to buckle, warp, or even crack. During your inspection, look for any wavy or distorted panels, as this is a classic sign of improper fastening. You can also gently try to slide a panel back and forth along the nailing hem; you should feel a little bit of give. If it’s completely rigid, it may have been installed too tightly, which could lead to problems down the road. Catching these issues early is key to any successful home renovation.
Clean Siding Without Causing Damage
Keeping your siding clean not only improves your home’s curb appeal but also prevents the buildup of dirt, mold, and mildew. When you wash your siding, use a soft-bristle brush or cloth with a simple solution of mild soap and water. It’s important to remember that vinyl siding is designed to let some water in and then drain it away. Because of this, you should avoid using a high-pressure washer, as it can force water up behind the panels and into your wall structure. If you do use a pressure washer, keep it on a low setting and spray at a downward angle, never directly at the seams or overlaps. A gentle cleaning once or twice a year is usually all it takes to keep your siding looking fresh and new, just like the homes in our project gallery.
Know When to Call a Professional
While routine inspections and cleaning are great DIY tasks, some issues are best left to the experts. If you notice significant problems like large gaps between panels, widespread warping, or cracked siding, it’s time to call for a professional assessment. Trying to fix these issues yourself without the right tools or experience can often make things worse. It’s always better to hire a qualified professional to avoid simple mistakes and prevent the need for future repairs. A professional contractor can identify the root cause of the problem—whether it’s improper installation or something else—and provide a lasting solution. Don’t hesitate to contact us if you spot anything concerning; a timely repair can protect your home from more extensive damage.
Related Articles
Frequently Asked Questions
Why shouldn’t I use caulk on the siding seams? It seems like it would make it more waterproof. That’s a common thought, but sealing the overlaps is one of the worst things you can do. Vinyl siding is designed as a water-resistant screen, not a waterproof barrier. It expects a little wind-driven rain to get behind it. The unsealed overlaps and tiny weep holes at the bottom of each panel are there to let that moisture drain out safely. When you seal the seams, you trap that water, which can lead to mold, rot, and serious damage to your home’s structure.
My siding looks wavy in some spots, especially on sunny days. What’s causing that? A wavy or buckled appearance is almost always a sign that the siding can’t move freely. Vinyl naturally expands in the heat, and if it was nailed too tightly to the wall or overlapped too much during installation, it has nowhere to go. That pressure forces the panels to warp. A professional installation ensures each panel is hung with enough room to slide back and forth as temperatures change, keeping your walls looking straight and smooth.
How can I tell if my contractor is installing my new siding correctly? A great contractor will be precise and methodical. You should see them using a level and chalk line to keep every course straight. Pay attention to the nailing; you should hear the nail gun, but the panels shouldn’t be pinned tightly. A pro will leave a tiny gap, about the thickness of a dime, between the nail head and the siding. You can also ask them about how they account for temperature on the day of installation—their answer will tell you a lot about their expertise.
Does the standard 1-inch overlap rule apply in a climate like Chicago’s with such extreme temperatures? Yes, it absolutely does, and it’s even more critical here. The 1 to 1¼-inch standard is designed specifically to handle the significant expansion and contraction that happens between our hot summers and freezing winters. This measurement provides the perfect balance, keeping the seams secure against wind and rain while giving the panels enough room to shift without buckling or pulling apart. In a four-season climate, getting this detail right is non-negotiable.
Is it a big deal if just a few seams look a little off? Even a few incorrect seams can be a red flag for bigger issues. An improper overlap in one spot can create a domino effect, putting stress on surrounding panels and creating entry points for water. While it might just look like a small cosmetic flaw at first, it could indicate a systemic installation problem that leads to widespread warping or hidden moisture damage over time. It’s always best to address these inconsistencies to protect the integrity of your entire exterior.